
Installing a vapor barrier behind shower walls is a crucial step in ensuring the long-term durability and health of your bathroom. Bathrooms, particularly shower areas, are constantly exposed to high levels of moisture and humidity. Without proper moisture control, this environment can lead to severe issues such as mold growth, structural damage, and decreased energy efficiency.
A vapor barrier serves as a protective shield that prevents water vapor from penetrating the wall assembly. By blocking moisture from reaching the underlying structures, a vapor barrier helps maintain the integrity of insulation and other building materials. This is especially important in shower walls, where continuous exposure to water can cause significant deterioration over time.
One of the key benefits of installing a vapor barrier is the prevention of mold and mildew. These fungi thrive in damp, humid conditions and can spread rapidly behind walls if moisture is not effectively managed. Mold not only damages building materials but also poses serious health risks to occupants, including respiratory issues and allergic reactions. By keeping the wall cavity dry, a vapor barrier minimizes the risk of mold growth, contributing to a healthier indoor environment.
In addition to protecting against mold, a vapor barrier also enhances the overall energy efficiency of your home. Moisture-laden insulation loses its thermal resistance, leading to higher energy consumption as heating and cooling systems work harder to maintain comfortable indoor temperatures. A properly installed vapor barrier ensures that insulation remains dry and effective, helping to reduce energy costs and improve the home’s energy performance.
Furthermore, a vapor barrier extends the lifespan of your bathroom's structural components. Moisture can cause wood to rot and metal to corrode, leading to costly repairs and replacements. By preventing moisture infiltration, a vapor barrier helps preserve the structural integrity of your home, saving you time and money in the long run.
In conclusion, installing a vapor barrier behind shower walls is an essential practice for any bathroom construction or renovation project. It protects against moisture damage, improves energy efficiency, and promotes a healthier living environment. Investing in a high-quality vapor barrier and ensuring proper installation will provide lasting benefits, safeguarding your home from the detrimental effects of moisture and enhancing its overall durability and comfort.
What is a Vapor Barrier?
Definition and Purpose
A vapor barrier is a specialized material designed to prevent moisture from penetrating building assemblies such as walls, floors, and ceilings. Its primary function is to block water vapor from infiltrating and damaging structural components. This barrier is especially critical in areas with high humidity, such as bathrooms and shower walls, where the constant presence of moisture can lead to significant issues if not properly managed.
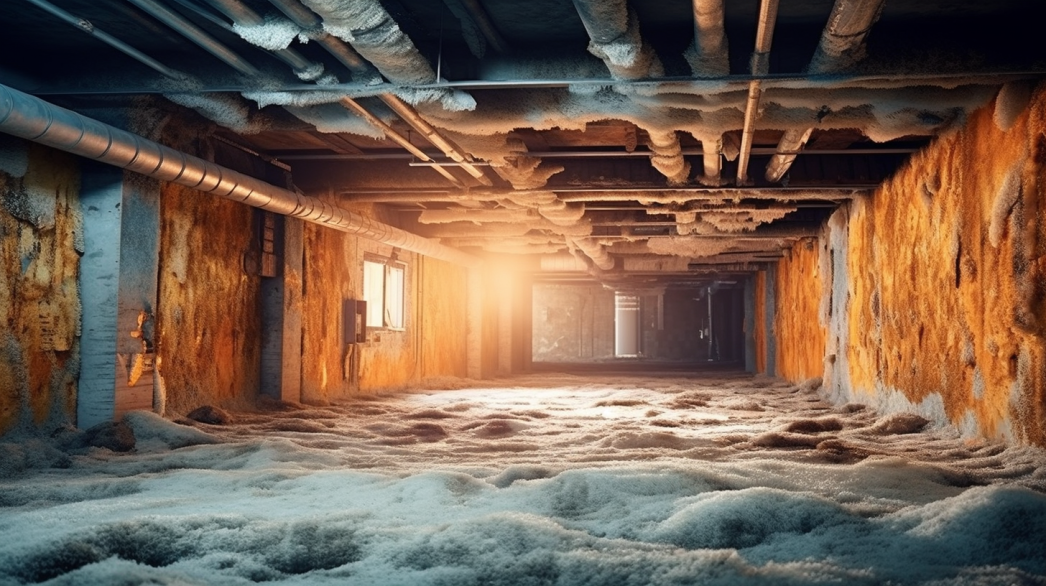
In environments like bathrooms, where showers and baths create a substantial amount of water vapor, the need for a vapor barrier becomes even more pronounced. Without a vapor barrier, moisture can seep into the walls and floors, leading to mold growth, wood rot, and deterioration of insulation. These problems not only compromise the structural integrity of the building but also pose health risks due to mold and mildew.
By installing a vapor barrier, you create a protective layer that helps maintain the integrity of the building materials and ensures a healthier indoor environment. This barrier effectively controls moisture levels, reducing the likelihood of water-related damage and prolonging the lifespan of the building components.
Types of Vapor Barriers
There are various types of vapor barriers available, each suited to different applications and environments. Here are some common types:
Plastic Sheeting:
- Description: Plastic sheeting, typically made from polyethylene, is one of the most commonly used vapor barriers. It is available in various thicknesses, with thicker sheets providing greater resistance to moisture.
- Uses: This type of vapor barrier is often used in walls, floors, and ceilings, particularly in basements and crawl spaces. In bathrooms, plastic sheeting is ideal for use behind shower walls and other high-humidity areas.
- Advantages: Plastic sheeting is durable, flexible, and relatively easy to install. It provides an effective moisture barrier that can adapt to a variety of building applications.
Foil-Backed Drywall:
- Description: Foil-backed drywall incorporates a layer of aluminum foil on the back side, serving as both a vapor barrier and a reflective insulation layer.
- Uses: Commonly used in walls and ceilings, foil-backed drywall is particularly effective in controlling moisture in high-humidity areas such as bathrooms and kitchens.
- Advantages: This type of vapor barrier is easy to install during the construction or renovation process and provides the added benefit of enhanced thermal insulation, which can improve energy efficiency.
Vapor-Retardant Paint:
- Description: Vapor-retardant paint is a specialized coating designed to reduce the permeability of walls and ceilings to water vapor. It is applied like regular paint but provides an additional layer of moisture protection.
- Uses: This type of vapor barrier is ideal for existing buildings where traditional barriers may be difficult to install. It can be applied over existing finishes, making it an excellent option for retrofitting and renovations.
- Advantages: Vapor-retardant paint is a cost-effective solution that can be easily applied to various surfaces. It helps to control moisture levels without the need for extensive construction work.
By understanding the definition, purpose, and types of vapor barriers, homeowners and builders can choose the most suitable option for their specific needs. Proper selection and installation of vapor barriers are crucial for maintaining a dry, healthy, and energy-efficient indoor environment, particularly in high-humidity areas like bathrooms and shower walls.
Preparing for Installation
Gathering Necessary Tools and Materials
Before installing a vapor barrier, it's essential to gather all the necessary tools and materials. Proper preparation ensures a smooth installation process and maximizes the effectiveness of the vapor barrier.
Vapor barrier material:
Selection: Choose the appropriate vapor barrier material based on your specific needs and the area where it will be installed. Options include plastic sheeting, foil-backed drywall, or vapor-retardant paint. Ensure the material is suitable for the environment, particularly in high-humidity areas like bathrooms and shower walls.
Utility knife, tape measure, staple gun:
- Utility Knife: Essential for cutting the vapor barrier material to the required size and shape. Ensure the blade is sharp for clean, precise cuts.
- Tape Measure: Used for accurately measuring the dimensions of the walls, floors, or ceilings where the vapor barrier will be installed. Accurate measurements are crucial for a proper fit and effective moisture control.
- Staple Gun: Necessary for securing plastic sheeting to wall studs or other structural elements. Choose a heavy-duty staple gun to ensure the barrier is firmly attached.
Caulk and caulk gun:
- Caulk: Select a high-quality waterproof caulk to seal seams, edges, and any penetrations in the vapor barrier. This prevents moisture from seeping through gaps and compromising the barrier’s effectiveness.
- Caulk Gun: Used for applying caulk smoothly and evenly. A good caulk gun allows for better control and precision, ensuring a thorough seal.
Protective gear:
Safety Gear: Wear appropriate protective gear such as gloves, safety goggles, and a mask to protect yourself from dust, debris, and any potential irritants during the installation process. Safety should always be a priority.
Ensuring a Clean and Dry Surface
A clean and dry surface is vital for the successful installation of a vapor barrier. Proper surface preparation prevents issues such as poor adhesion and ensures the barrier performs effectively.
Removing old materials and debris:
- Clear the Area: Remove any old materials, such as previous vapor barriers, insulation, or wall coverings. This ensures that the new vapor barrier can be installed on a clean, smooth surface.
- Debris Removal: Clean the area thoroughly to remove dust, dirt, and any loose debris. Use a broom, vacuum, or damp cloth to ensure the surface is free from contaminants that could affect the adhesion of the vapor barrier.
Repairing any wall damage:
- Inspect for Damage: Examine the walls for any signs of damage, such as cracks, holes, or water damage. These issues must be addressed before installing the vapor barrier to ensure a solid and stable surface.
- Make Necessary Repairs: Use appropriate materials to repair any damage. Fill cracks and holes with spackling compound or filler, and sand the area smooth. If there is significant water damage, ensure the underlying cause is fixed and the area is thoroughly dried before proceeding.
- Dry Surface: Ensure that the surface is completely dry before installation. Moisture behind the vapor barrier can lead to mold growth and reduce the barrier’s effectiveness.
By gathering the necessary tools and materials and ensuring a clean and dry surface, you can set the stage for a successful vapor barrier installation. These preparatory steps are crucial for achieving an effective moisture barrier that protects your home from water damage, enhances energy efficiency, and promotes a healthy indoor environment.
Installing a Vapor Barrier Behind Shower Walls
Step 1: Measuring and Cutting the Vapor Barrier
Accurate measurement and cutting are crucial for a successful vapor barrier installation. This ensures full coverage and effective moisture protection.
Accurately measuring the shower wall area:
- Tools Needed: Use a tape measure to determine the dimensions of the shower walls. Measure the height and width of each wall, including any alcoves or niches.
- Recording Measurements: Write down the measurements carefully, adding a few extra inches to each dimension to allow for overlap at seams and edges.
Cutting the vapor barrier to fit, allowing for overlap at seams:
- Cutting Process: Lay out the vapor barrier material, such as plastic sheeting or foil-backed drywall, on a clean, flat surface. Use a utility knife to cut the material according to your measurements.
- Allowing for Overlap: Ensure each piece of the vapor barrier is cut slightly larger than the measured area to provide at least a 6-inch overlap at seams. This overlap is essential for creating a continuous moisture barrier.
Step 2: Securing the Vapor Barrier
Securing the vapor barrier correctly ensures it stays in place and functions effectively. Different materials require different methods of attachment.
Attaching Plastic Sheeting
Using a staple gun to attach the plastic sheeting to the studs:
- Positioning the Sheeting: Start at the top of the wall and position the plastic sheeting against the studs. Ensure it is aligned correctly with the wall's height and width.
- Stapling: Use a staple gun to attach the sheeting to the studs, placing staples every 6 to 8 inches along the top edge. Continue stapling down the sides and bottom, ensuring the sheeting is taut and smooth.
Ensuring a tight seal with no wrinkles or air pockets:
- Smoothing the Material: As you staple, smooth out any wrinkles or air pockets. A tight seal is critical to prevent moisture from penetrating the barrier.
- Overlapping Sheets: Where sheets overlap, use high-quality waterproof tape to seal the seams securely. Press the tape firmly to ensure a tight bond.
Using Foil-Backed Drywall
Installing the drywall as per manufacturer's instructions:
- Positioning the Drywall: Align the foil-backed drywall with the studs and secure it using drywall screws. Follow the manufacturer’s guidelines for spacing and attachment to ensure stability.
- Cutting to Fit: Use a utility knife to cut the drywall to fit around fixtures and outlets, ensuring all areas are covered.
Sealing seams with appropriate tape and sealant:
- Taping Seams: Apply foil tape or another appropriate tape along the seams between drywall sheets. Press the tape firmly to ensure a tight seal.
- Applying Sealant: Use a waterproof sealant to further seal the seams and edges, ensuring no gaps remain.
Applying Vapor-Retardant Paint
Priming the surface if required:
Surface Preparation: Clean the surface thoroughly and apply a primer if recommended by the paint manufacturer. Priming helps the paint adhere better and enhances its effectiveness.
Applying multiple coats for maximum effectiveness:
- First Coat: Apply the first coat of vapor-retardant paint evenly using a brush or roller. Allow it to dry completely according to the manufacturer’s instructions.
- Additional Coats: Apply additional coats as necessary, typically two to three coats, to ensure maximum moisture resistance. Allow each coat to dry thoroughly before applying the next.
Step 3: Sealing the Edges and Seams
Properly sealing the edges and seams is essential for creating a continuous vapor barrier that effectively blocks moisture.
Using caulk to seal around edges, corners, and penetrations:
- Applying Caulk: Use a high-quality waterproof caulk to seal around the edges of the vapor barrier, at corners, and around any penetrations such as pipes and fixtures.
- Smoothing the Seal: Smooth the caulk with a caulking tool or your finger to ensure it fills all gaps and adheres well to the surfaces.
Ensuring no gaps remain for moisture to seep through:
Thorough Inspection: Inspect all sealed areas carefully to ensure there are no gaps or weak points. Reapply caulk or tape as needed to achieve a complete seal.
Step 4: Installing the Backer Board
The final step involves installing the backer board over the vapor barrier to provide a stable, waterproof surface for tiling.
Placing cement backer board over the vapor barrier:
- Positioning the Backer Board: Align the cement backer board with the studs and ensure it covers the entire area protected by the vapor barrier.
- Cutting to Fit: Cut the backer board to fit around fixtures and outlets, using a utility knife or a saw designed for cutting cement board.
Securing the backer board with screws and ensuring it is flush:
- Attaching the Board: Use cement board screws to attach the backer board to the studs, spacing the screws according to the manufacturer’s instructions.
- Ensuring a Smooth Surface: Check that the backer board is flush with the studs and each piece is securely fastened. This provides a solid, level surface for tiling.
By following these detailed steps for installing a vapor barrier behind shower walls, you can ensure effective moisture control, protect your bathroom’s structural integrity, and create a durable foundation for your shower area. Proper installation of a vapor barrier is crucial for maintaining a healthy, efficient, and long-lasting bathroom environment.
Expert Tips for a Successful Vapor Barrier Installation
Ensuring a Tight Seal
Achieving a tight seal is essential for the effectiveness of a vapor barrier. Any gaps or loose areas can allow moisture to penetrate, compromising the barrier's performance and leading to potential damage. Here’s how to ensure a tight seal:
Double-checking for gaps or loose areas:
- Thorough Inspection: After installing each section of the vapor barrier, carefully inspect the entire surface for any gaps or loose areas. Pay particular attention to seams, edges, and corners where the material is most likely to lift or separate.
- Physical Checks: Run your hands along the seams and edges to feel for any gaps that might not be visible. A physical check can often reveal issues that are missed during a visual inspection.
Using high-quality tape and caulk for sealing:
- Waterproof Tape: Use high-quality waterproof tape specifically designed for vapor barriers to seal all seams. Apply the tape firmly along the entire length of each seam, pressing it down to ensure a tight bond.
- Caulking Edges and Penetrations: For edges and penetrations such as pipes, electrical outlets, and fixtures, use a high-quality waterproof caulk. Apply a continuous bead of caulk and smooth it out with a caulking tool or your finger to ensure complete coverage and adhesion.
Working in Manageable Sections
Handling the vapor barrier in smaller, manageable sections helps reduce the risk of wrinkles and ensures a more precise installation. It also makes the process easier and more efficient.
Handling the vapor barrier in smaller pieces to reduce wrinkles:
- Cut to Size: Cut the vapor barrier into smaller sections that are easier to handle. This approach minimizes the risk of wrinkles and air pockets that can compromise the barrier’s effectiveness.
- Align and Attach: Align each section carefully before attaching it. Starting from one end, smooth out the material as you go, ensuring it lays flat against the surface.
Overlapping seams by at least 6 inches:
- Proper Overlap: Ensure that each section of the vapor barrier overlaps the adjacent sections by at least 6 inches. This overlap is crucial for creating a continuous barrier that effectively prevents moisture from seeping through.
- Sealing Overlaps: Use waterproof tape to seal the overlaps, ensuring that the seams are tightly bonded. Press the tape firmly to eliminate any gaps or air pockets.
Maintaining Proper Ventilation During Installation
Proper ventilation is important during vapor barrier installation to ensure a safe working environment and to help manage humidity levels, which can affect the barrier’s performance.
Keeping windows open and using fans to ensure airflow:
- Natural Ventilation: Keep windows open during the installation process to allow fresh air to circulate. This helps to reduce humidity and provides a more comfortable working environment.
- Using Fans: Set up fans to enhance airflow, especially in enclosed spaces. Position the fans to create a cross-breeze that efficiently moves air through the area, reducing moisture levels.
Reducing humidity levels during installation:
- Dehumidifiers: Use dehumidifiers to control the humidity levels in the installation area. Lower humidity helps ensure that the vapor barrier adheres properly and remains effective.
- Monitor Conditions: Regularly monitor the humidity levels with a hygrometer. Aim to keep the humidity below 60% during installation to prevent moisture from affecting the barrier’s performance.
By following these expert tips, you can ensure a successful vapor barrier installation that effectively protects your home from moisture damage. Ensuring a tight seal, working in manageable sections, and maintaining proper ventilation are key practices that contribute to the longevity and effectiveness of your vapor barrier.
Avoiding Installation Pitfalls
Overlapping Seams Incorrectly
One of the most common mistakes during vapor barrier installation is overlapping seams incorrectly. Properly overlapping and sealing seams is crucial to ensure the barrier effectively prevents moisture from penetrating.
Proper techniques for overlapping and sealing seams:
- Adequate Overlap: Ensure that each sheet of vapor barrier material overlaps the adjacent sheet by at least 6 inches. This overlap creates a continuous barrier that prevents moisture from seeping through the seams.
- Aligning Seams: Align the seams carefully before sealing them. Avoid aligning seams with structural joints or changes in plane, as these can create weak points.
- Sealing with Waterproof Tape: Use high-quality waterproof tape to seal the seams. Apply the tape along the entire length of the seam, pressing firmly to ensure a tight bond. Smooth out any wrinkles or bubbles to create a flat, secure seal.
- Double Sealing: For added protection, consider double sealing the seams by applying a second layer of tape. This can help reinforce the seam and provide extra assurance against moisture penetration.
Neglecting to Seal Penetrations
Neglecting to seal around pipes, fixtures, and other penetrations can compromise the effectiveness of the vapor barrier. Proper sealing of these areas is essential to maintain a continuous moisture barrier.
Importance of sealing around pipes, fixtures, and other penetrations:
- Identify All Penetrations: Before installing the vapor barrier, identify all the areas where pipes, fixtures, electrical outlets, and other elements penetrate the walls. These areas are potential entry points for moisture.
- Using Appropriate Materials: Use a high-quality, flexible sealant that can accommodate movement and expansion around penetrations. This ensures the seal remains intact even as the building settles or shifts.
- Applying Sealant: Apply a continuous bead of sealant around the edges of each penetration. Smooth the sealant with a caulking tool or your finger to ensure it fully covers the gap and adheres to both the vapor barrier and the penetration.
- Sealing Large Gaps: For larger gaps, use a combination of sealant and additional vapor barrier material to create a patch that covers the penetration securely. Tape the edges of the patch to the existing vapor barrier to ensure a tight seal.
Using Incompatible Materials
Using materials that are not suitable for the specific environment can undermine the effectiveness of the vapor barrier. It is crucial to select materials that are compatible with bathroom environments, where moisture and humidity levels are consistently high.
Ensuring all materials are suitable for bathroom environments:
- Selecting the Right Vapor Barrier: Choose vapor barrier materials specifically designed for high-humidity areas, such as plastic sheeting, foil-backed drywall, or vapor-retardant paint. These materials are formulated to withstand the moisture levels typically found in bathrooms.
- High-Quality Sealants and Tape: Use sealants and tape that are waterproof and designed for use with vapor barriers. Products that are not designed for high-humidity environments may degrade over time, compromising the barrier’s effectiveness.
- Compatibility Check: Ensure that all components used in the installation process, including adhesives, tapes, and sealants, are compatible with the chosen vapor barrier material. Incompatible materials can lead to poor adhesion and reduced performance.
- Manufacturer Recommendations: Follow the manufacturer’s recommendations for all products used in the installation. This includes adhering to guidelines for application, curing times, and environmental conditions.
By avoiding these common installation pitfalls, you can ensure the vapor barrier is installed correctly and performs effectively. Properly overlapping seams, sealing penetrations, and using compatible materials are essential steps in creating a continuous and durable moisture barrier that protects your home from water damage.
FAQs
Contact Crawl Logic Today!
Crawl Logic will do everything we can to ensure your experience with us is excellent.
Request A FREE Estimate
CHECKOUT RECENT POST

Schedule Your FREE Crawl Space Evaluation!
Did you know YOU DON'T HAVE TO BE HOME for us to provide you with your 100% FREE crawl space inspection and report?
CHOOSE THE BEST OPTION, CRAWL LOGIC!
Ready to Elevate Your Experience? Let's embark on a journey to success together! Our team is dedicated to delivering excellence and innovation tailored to your unique needs. Connect with us now to discover how our services can transform your vision into reality. Your next big leap starts here
Crawl Logic - Franklin Crawl Space Encapsulation and Repair
COMPANY INFO
Address: Franklin, Tennessee, United States
Email:
joshuamaynor1988@gmail.com
Phone: 615-257-9772
Office: 615-540-2278
HOURS
Monday: 8:00AM - 5:00PM
Tuesday: 8:00AM - 5:00PM
Wednesday: 8:00AM - 5:00PM
Thursday: 8:00AM - 5:00PM
Friday: 8:00AM - 5:00PM
Saturday: CLOSED
Sunday: CLOSED
Copyright © 2020 Crawl Logic - Franklin Crawl Space Encapsulation and Repair