
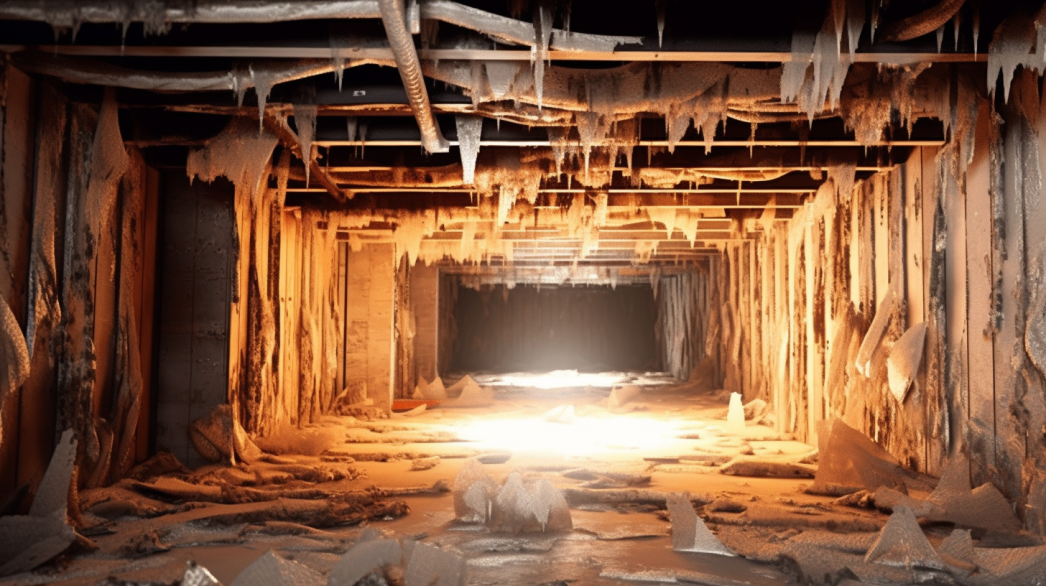
Basements, by their very nature, are prone to moisture problems. Located below ground level, they are in direct contact with soil and often subjected to varying levels of groundwater pressure. This makes them susceptible to moisture infiltration, which can lead to a host of issues ranging from structural damage to health hazards. Vapor barriers are an essential component in mitigating these risks, providing a protective layer that helps control moisture levels and maintain the integrity of the basement space.
Vapor barriers also play a crucial role in enhancing the energy efficiency of a home. Moisture can affect the insulation properties of basement walls and floors, making it harder to maintain a consistent indoor temperature. By keeping moisture at bay, vapor barriers help insulation perform more effectively, leading to reduced energy consumption and lower heating and cooling costs.
Investing in a vapor barrier is a proactive measure that can significantly extend the lifespan of a basement. By preventing moisture infiltration, vapor barriers protect against long-term damage that could compromise the structural integrity of the space. This not only preserves the basement itself but also adds value to the entire property by ensuring that the foundation remains strong and stable.
When considering the installation of a vapor barrier in a basement, it’s important to choose the right materials and follow best practices to ensure maximum effectiveness. This includes selecting high-quality vapor barriers, ensuring proper installation techniques, and addressing any existing moisture issues before installation. Regular maintenance and inspections are also crucial to ensure that the vapor barrier continues to perform effectively over time.
In conclusion, vapor barriers are an indispensable element in basement construction and maintenance. They provide critical protection against moisture, improve air quality, enhance energy efficiency, and extend the overall lifespan of the basement. For homeowners looking to safeguard their investment and create a healthier living environment, installing a vapor barrier in the basement is a wise and necessary step.
Step 1: Clean and Dry the Basement
The first and most critical step in preparing your basement for the installation of a vapor barrier is to ensure that the space is thoroughly cleaned and dried. This foundational step helps prevent future moisture problems and ensures that the vapor barrier can function effectively. Here’s how to do it:
Removing Existing Moisture
Using Dehumidifiers
Dehumidifiers are essential tools for reducing the humidity levels in your basement. They work by drawing moisture out of the air, which helps to dry out the space more quickly and efficiently.
How to use dehumidifiers:
- Select the Right Size: Choose a dehumidifier that is appropriately sized for your basement. Larger areas may require more powerful units or multiple dehumidifiers.
- Positioning: Place the dehumidifier in a central location for maximum effectiveness. If using more than one, ensure they are evenly distributed throughout the space.
- Continuous Operation: Run the dehumidifier continuously until the humidity level drops to an acceptable range (ideally below 50%).
Ventilating the Area with Fans
Fans can help speed up the drying process by improving air circulation. Proper ventilation is crucial for removing moisture from the air and surfaces.
How to ventilate with fans:
- Strategic Placement: Position fans in different parts of the basement to ensure even airflow. Aim them towards areas with visible moisture or dampness.
- Open Windows and Doors: If possible, open windows and doors to allow fresh air to circulate and assist with drying.
- Combination with Dehumidifiers: Use fans in conjunction with dehumidifiers to enhance the overall drying process.
Fixing Any Leaks or Sources of Water Ingress
Identifying and fixing any leaks or sources of water ingress is crucial to prevent future moisture problems. This step ensures that your efforts to dry and clean the basement are not undermined by ongoing water intrusion.
Steps to fix leaks:
- Inspect Thoroughly: Check all walls, floors, and ceilings for signs of leaks or water ingress. Pay special attention to areas around windows, doors, and plumbing fixtures.
- Repair Techniques: Use appropriate repair methods such as patching cracks with hydraulic cement, sealing gaps with silicone caulk, or applying waterproof coatings to walls and floors.
- Professional Help: For significant leaks or structural issues, consider hiring a professional to ensure the problem is resolved correctly and thoroughly.
Cleaning the Surface
Removing Dirt, Dust, and Debris
A clean surface is essential for the proper adhesion and effectiveness of the vapor barrier. Removing all dirt, dust, and debris ensures a smooth and uniform installation.
Cleaning steps:
- Sweep and Vacuum: Start by sweeping the floors and vacuuming all surfaces to remove loose dirt and debris.
- Wash Surfaces: Use a mild detergent and water to wash walls and floors, removing any remaining grime. Rinse with clean water and allow to dry completely.
- Dust Control: Use a damp cloth or mop to capture and remove fine dust particles that may remain after sweeping and vacuuming.
Repairing Any Cracks or Damage to the Walls and Floors
Repairing any existing damage is crucial to ensure the vapor barrier adheres properly and performs effectively.
Repair steps:
- Inspect for Damage: Carefully inspect all surfaces for cracks, holes, or other damage.
- Fill Cracks and Holes: Use appropriate filler materials such as hydraulic cement for cracks in concrete or spackling compound for smaller holes in drywall. Ensure the repairs are smooth and level with the surrounding surface.
- Allow to Cure: Follow the manufacturer's instructions for curing times to ensure the repairs are fully set and dry before proceeding with vapor barrier installation.
Step 2: Measure and Cut the Vapor Barrier
Once your basement is clean and dry, the next step is to measure and cut the vapor barrier accurately. Proper measurement and cutting ensure that the barrier fits perfectly and functions effectively, providing maximum protection against moisture infiltration.
Measuring the Basement Area
Accurate Measurement Techniques
Accurate measurements are crucial to ensure that the vapor barrier covers all necessary areas without gaps or insufficient coverage. Follow these techniques for precise measurements:
Techniques:
- Use a Tape Measure: A tape measure is essential for obtaining accurate dimensions of the basement. Ensure it is long enough to cover the entire length and width of the areas you are measuring.
- Measure Each Wall Separately: Measure the height and width of each wall individually, as basements can have varying dimensions due to construction irregularities.
- Include the Floor: Measure the length and width of the basement floor, ensuring you account for any alcoves or irregularities in shape.
Allowing Extra Material for Overlaps and Seams
To ensure a continuous moisture barrier, it is important to allow extra material for overlaps and seams. This additional material ensures that there are no gaps where moisture can penetrate.
Tips:
- Add 6-12 Inches: Allow for an extra 6-12 inches of material on all sides of each piece. This extra material will be used for overlapping seams and ensuring a tight seal around edges.
- Account for Fixtures: Measure and account for any fixtures, such as pipes or support beams, and add extra material to wrap around these obstacles.
Cutting the Barrier
Using a Utility Knife or Heavy-Duty Scissors for Precise Cuts
Cutting the vapor barrier accurately is essential for a snug fit and effective moisture protection. Using the right tools ensures clean, precise cuts.
Tools and Techniques:
- Utility Knife: A sharp utility knife is ideal for cutting large sheets of vapor barrier material. Use a straightedge or a cutting board to guide your cuts and ensure they are straight and clean.
- Heavy-Duty Scissors: Heavy-duty scissors are useful for smaller cuts or for trimming pieces to fit around fixtures and tight spaces. Ensure the scissors are sharp to avoid tearing the material.
- Cut on a Flat Surface: Always cut the vapor barrier on a flat, stable surface to maintain control and precision.
Cutting Pieces to Fit Wall and Floor Dimensions
After measuring and marking the vapor barrier material, the next step is to cut it to fit the dimensions of your basement walls and floor.
Steps:
- Mark the Measurements: Using a pencil or chalk, mark the measurements on the vapor barrier material. Ensure the marks are clear and accurate.
- Cut with Precision: Follow the marked lines carefully, cutting each piece to match the measured dimensions. Remember to include the extra material for overlaps.
- Label Each Piece: Once cut, label each piece to indicate where it will be installed (e.g., "North Wall," "South Wall," "Floor"). This helps streamline the installation process and ensures each piece is used in the correct location.
Step 3: Install the Vapor Barrier on Walls
Installing the vapor barrier on the walls of your basement is a crucial step to ensure effective moisture protection. Proper installation techniques help create a continuous barrier that prevents moisture infiltration, enhancing the durability and health of your basement. Follow these detailed steps to achieve a successful installation.
Positioning the Barrier
Starting from the Bottom and Working Upwards
To ensure proper coverage and ease of installation, begin positioning the vapor barrier from the bottom of the wall and work your way upwards.
Steps:
- Align the Bottom Edge: Position the bottom edge of the vapor barrier at the base of the wall, ensuring it extends slightly onto the floor to cover the joint between the wall and the floor.
- Smooth Upwards: Smooth the vapor barrier upwards as you go, ensuring it lies flat against the wall without wrinkles or air pockets.
- Overlap Edges: Overlap the edges of each successive strip of vapor barrier by 6-12 inches to ensure a continuous, moisture-proof layer.
Ensuring Even Placement and Full Coverage
Ensuring that the vapor barrier is evenly placed and fully covers the wall is vital for its effectiveness.
Techniques:
- Check Alignment: Use a level to check that the vapor barrier is aligned correctly and adjust as necessary to maintain even placement.
- Full Coverage: Make sure that the vapor barrier covers the entire wall surface, including corners and edges, without any gaps.
Securing the Barrier
Using a Staple Gun to Attach the Barrier to the Walls
Securing the vapor barrier with a staple gun ensures it stays in place and provides a tight seal against moisture.
Steps:
- Choose the Right Staples: Use staples that are long enough to penetrate the vapor barrier and secure it firmly to the wall.
- Start at the Top: Begin stapling at the top edge of the vapor barrier and work your way down. This helps keep the material taut and prevents it from sagging.
- Even Spacing: Place staples at regular intervals of about 6-8 inches along the edges and seams of the vapor barrier. Ensure additional staples are placed around any openings or fixtures to maintain a secure attachment.
Placing Staples at Regular Intervals for Secure Attachment
Regularly spaced staples ensure that the vapor barrier remains securely attached and maintains its integrity over time.
Best Practices:
- Consistent Pressure: Apply consistent pressure on the staple gun to ensure each staple is driven in fully and evenly.
- Double Check: After stapling, inspect the entire surface to ensure no sections are loose or missed.
Sealing Seams and Edges
Applying Caulk or Sealant Along Seams and Edges
Sealing the seams and edges of the vapor barrier with caulk or sealant provides an additional layer of protection against moisture infiltration.
Steps:
- Select the Right Sealant: Choose a high-quality caulk or sealant suitable for your specific vapor barrier material and basement conditions.
- Apply Evenly: Apply a continuous bead of sealant along all seams and edges where the vapor barrier pieces overlap or meet the wall and floor.
- Smooth the Sealant: Use a caulk smoothing tool or your finger to smooth the bead of sealant, ensuring it fully covers the seam and adheres properly to both surfaces.
Using Tape to Secure Overlaps
Securing overlaps with tape ensures a tight, continuous seal that enhances the barrier’s effectiveness.
Steps:
- Select the Right Tape: Use tape designed for vapor barrier applications, such as butyl or acrylic tape, which provides strong adhesion and durability.
- Press Firmly: Press the tape firmly over the overlapped sections of the vapor barrier, using a seam roller to ensure a tight bond and eliminate air bubbles.
- Cover All Seams: Ensure that all seams, overlaps, and edges are fully covered with tape to prevent any gaps where moisture could penetrate.
Step 4: Install the Vapor Barrier on Floors
Installing a vapor barrier on the floors of your basement is a critical step in creating a comprehensive moisture protection system. Proper installation techniques ensure that the barrier is effective in preventing moisture from seeping up through the floor, protecting your basement and the entire structure from potential damage.
Laying Out the Barrier
Rolling Out the Polyethylene Sheeting Across the Floor
The first step in installing the floor vapor barrier is to roll out the polyethylene sheeting evenly across the entire floor area.
Steps:
- Prepare the Sheeting: Unroll the polyethylene sheeting and let it rest for a few minutes to flatten out naturally. This helps to reduce the formation of wrinkles and bubbles.
- Start at One End: Begin at one end of the basement and roll the sheeting out across the floor, ensuring it extends slightly up the walls to overlap with the wall vapor barriers.
- Cut to Size: Use a utility knife or heavy-duty scissors to cut the sheeting to the appropriate length, allowing extra material for overlapping seams and edges.
Ensuring the Barrier Lays Flat Without Wrinkles or Bubbles
To maximize the effectiveness of the vapor barrier, it is crucial to ensure that it lays flat and smooth on the floor without any wrinkles or bubbles.
Techniques:
- Smooth as You Go: As you unroll the sheeting, use your hands or a smooth trowel to gently press and smooth out the material, working from the center towards the edges to push out any air bubbles.
- Check for Wrinkles: Periodically check the entire surface for wrinkles and adjust as necessary, pulling the sheeting taut to eliminate any slack.
Securing the Floor Barrier
Using Adhesive or Tape Along the Perimeter
Securing the vapor barrier to the floor ensures it remains in place and maintains a continuous seal with the wall barriers.
Steps:
- Choose the Right Adhesive: Select a high-quality adhesive or tape specifically designed for use with polyethylene sheeting and vapor barriers.
- Apply Along the Edges: Apply a continuous bead of adhesive or strips of tape along the perimeter of the floor, where the sheeting meets the walls.
- Press Firmly: Press the sheeting firmly into the adhesive or tape to ensure a secure bond. Use a seam roller to ensure full contact and eliminate any gaps.
Ensuring a Tight Seal with Wall Barriers
Creating a tight seal between the floor barrier and the wall barriers is essential for maintaining a continuous moisture barrier.
Steps:
- Overlap with Wall Barriers: Ensure that the floor sheeting overlaps with the wall barriers by at least 6-12 inches. This overlap helps create a seamless transition between the two barriers.
- Secure Overlaps: Use tape or adhesive to secure the overlaps, pressing firmly to ensure a tight, moisture-proof seal.
Sealing the Perimeter
Applying Sealant Around the Edges of the Barrier
Applying sealant around the edges of the floor vapor barrier provides an additional layer of protection against moisture infiltration.
Steps:
- Select the Right Sealant: Choose a high-quality, moisture-resistant sealant suitable for use with polyethylene sheeting.
- Continuous Bead: Apply a continuous bead of sealant along the edges of the vapor barrier, where it meets the walls and any other structural elements.
- Smooth the Sealant: Use a caulk smoothing tool or your finger to smooth the sealant, ensuring it fully covers the edge and creates a tight, continuous seal.
Ensuring a Continuous Moisture Barrier Without Gaps
To achieve a fully effective vapor barrier, it is essential to ensure there are no gaps or breaks in the barrier.
Techniques:
- Thorough Inspection: After sealing, inspect the entire perimeter and surface of the vapor barrier for any gaps, wrinkles, or areas that may not be fully adhered.
- Reapply as Needed: If any gaps or weak points are found, reapply adhesive, tape, or sealant as needed to reinforce the barrier.
- Final Check: Perform a final check to ensure that the entire barrier is continuous and fully sealed, with no visible gaps or areas where moisture could penetrate.
Step 5: Inspect and Finalize the Installation
The final step in installing a vapor barrier is to thoroughly inspect the entire installation to ensure that it is properly sealed and free from any gaps or overlaps. This step is crucial for verifying the effectiveness of the vapor barrier and ensuring long-term moisture protection for your basement. Here’s how to inspect and finalize the installation:
Checking for Gaps and Overlaps
Inspecting Seams and Edges for Complete Sealing
A thorough inspection of seams and edges is essential to ensure that the vapor barrier is fully sealed and no moisture can penetrate.
Steps:
- Examine Seams Closely: Carefully inspect all seams where sections of the vapor barrier overlap. Look for any gaps, wrinkles, or loose edges that might allow moisture to seep through.
- Check Edges and Corners: Pay special attention to the edges and corners of the barrier, where it meets the walls and floor. These areas are prone to gaps and require careful sealing.
- Use a Light Source: Shine a flashlight along seams and edges to highlight any small gaps or areas where the barrier might not be fully adhered.
Addressing Any Missed Spots or Gaps
Identifying and addressing any missed spots or gaps ensures the integrity of the vapor barrier.
Techniques:
- Mark Problem Areas: Use a marker or tape to mark any spots that need attention. This makes it easier to locate and fix them.
- Apply Additional Sealant: For small gaps or areas that are not fully sealed, apply an additional bead of sealant. Smooth it out to ensure complete coverage.
- Re-tape Overlaps: If overlaps are not properly taped, apply new tape over them. Press firmly and use a seam roller to ensure a tight bond.
Reinforcing Seals
Adding Additional Sealant or Tape if Necessary
Reinforcing the seals with additional sealant or tape ensures a robust and durable vapor barrier.
Steps:
- Reapply Sealant: Where needed, reapply sealant to any areas that appear weak or incomplete. Ensure a continuous bead is applied and smooth it out for a neat finish.
- Use High-Quality Tape: For reinforcing tape, use a high-quality tape designed for vapor barriers. This tape should provide a strong and lasting bond.
Ensuring All Overlaps Are Properly Taped
Properly taped overlaps are crucial for maintaining a continuous and effective moisture barrier.
Techniques:
- Overlap by 6-12 Inches: Ensure that all overlapping sections of the vapor barrier have at least 6-12 inches of overlap. This extra material helps create a secure seal.
- Press Firmly: Press the tape firmly over the overlaps, using a seam roller to eliminate any air bubbles and ensure a tight seal.
- Double Check: Go over each overlap one more time to ensure there are no missed spots and that the tape is securely in place.
FAQs
Contact Crawl Logic Today!
Crawl Logic will do everything we can to ensure your experience with us is excellent.
Request A FREE Estimate
CHECKOUT RECENT POST


Schedule Your FREE Crawl Space Evaluation!
Did you know YOU DON'T HAVE TO BE HOME for us to provide you with your 100% FREE crawl space inspection and report?
CHOOSE THE BEST OPTION, CRAWL LOGIC!
Ready to Elevate Your Experience? Let's embark on a journey to success together! Our team is dedicated to delivering excellence and innovation tailored to your unique needs. Connect with us now to discover how our services can transform your vision into reality. Your next big leap starts here
Crawl Logic - Franklin Crawl Space Encapsulation and Repair
COMPANY INFO
Address: Franklin, Tennessee, United States
Email:
joshuamaynor1988@gmail.com
Phone: 615-257-9772
Office: 615-540-2278
HOURS
Monday: 8:00AM - 5:00PM
Tuesday: 8:00AM - 5:00PM
Wednesday: 8:00AM - 5:00PM
Thursday: 8:00AM - 5:00PM
Friday: 8:00AM - 5:00PM
Saturday: CLOSED
Sunday: CLOSED
Copyright © 2020 Crawl Logic - Franklin Crawl Space Encapsulation and Repair