
Vapor barrier installation is a critical component in modern construction, ensuring that buildings are protected from moisture damage. A vapor barrier, typically made of plastic or foil sheets, is installed within the walls, floors, or ceilings of a structure to prevent moisture from passing through and causing mold, rot, and structural damage. Understanding the principles and proper methods of vapor barrier installation is essential for builders, contractors, and homeowners aiming to maintain the integrity and longevity of their properties.
In this blog, we will delve into the importance of vapor barriers, exploring their role in moisture control and indoor air quality. We will discuss the types of vapor barriers available, the materials used, and the specific applications for different parts of a building. By following a step-by-step guide, readers will learn how to effectively install vapor barriers, ensuring a secure and moisture-free environment.
Whether you are undertaking a new construction project or renovating an existing space, mastering the techniques of vapor barrier installation can significantly enhance the durability and comfort of your building. Join us as we explore the essential aspects of this crucial construction practice, providing you with the knowledge and skills needed to achieve professional results.
Types of Vapor Barriers
Understanding the different types of vapor barriers is essential for effective moisture control in construction. Vapor barriers can be broadly categorized into permeable and impermeable barriers, each serving distinct purposes based on their permeability levels and intended applications.
Permeable vs. Impermeable Barriers
Differences and Applications:
Permeable vapor barriers, also known as vapor retarders, allow a controlled amount of moisture to pass through. They are typically used in climates where it is beneficial to let buildings breathe, preventing the buildup of moisture within walls. These barriers are suitable for areas where some moisture diffusion is acceptable, such as in interior walls of homes located in moderate climates.
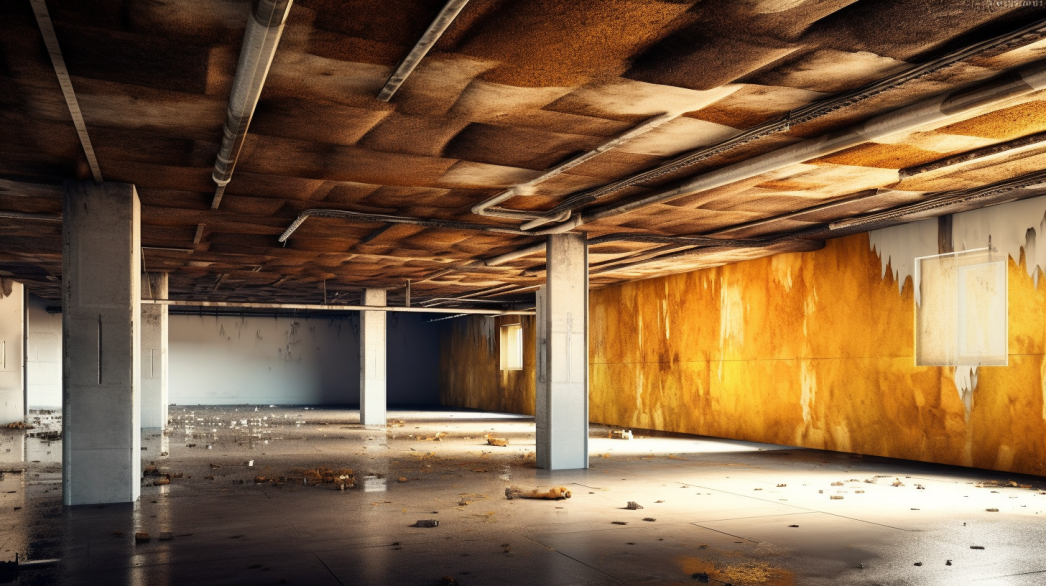
In contrast, impermeable vapor barriers block almost all moisture from passing through. These barriers are essential in regions with high humidity or in building areas highly susceptible to moisture damage, such as basements or crawl spaces. Impermeable barriers ensure that no water vapor penetrates the protected areas, safeguarding against mold and structural deterioration.
Examples of Each Type:
Permeable Barriers: Kraft paper and certain types of house wraps.
Impermeable Barriers: Polyethylene sheets and foil-backed materials.
Common Materials Used for Vapor Barriers
Polyethylene:
Polyethylene is one of the most widely used materials for vapor barriers due to its durability and effectiveness. It is typically available in large rolls of various thicknesses, making it versatile for different construction needs. Polyethylene sheets are impermeable, making them ideal for use in basements, crawl spaces, and other areas prone to high moisture levels.
Foil-backed Materials:
Foil-backed vapor barriers combine the properties of aluminum foil and other substrates, providing excellent moisture resistance and reflective insulation. These barriers are often used in attics and walls to not only block moisture but also reflect radiant heat, enhancing energy efficiency. The foil layer prevents vapor transmission while contributing to thermal regulation.
Kraft Paper:
Kraft paper is a permeable vapor retarder commonly used in insulation products. It allows some moisture to pass through, making it suitable for use in interior walls where complete moisture blockage is not necessary. Kraft paper is often found in faced insulation rolls and batts, providing a balance between moisture control and breathability.
Each of these materials offers unique benefits and is chosen based on the specific requirements of the building project and the local climate conditions. By selecting the appropriate type of vapor barrier, builders can effectively manage moisture levels, ensuring the longevity and health of the structure.
Preparing Your Space for Vapor Barrier Installation
Proper preparation is key to the successful installation of a vapor barrier. By carefully assessing the area and gathering the necessary tools and materials, you can ensure a smooth and effective installation process. This section will guide you through the essential steps to prepare your space for vapor barrier installation.
Assessing the Area
Checking for Existing Moisture Issues:
Before installing a vapor barrier, it's crucial to thoroughly inspect the area for any existing moisture problems. Look for signs of water damage, such as mold, mildew, or damp spots on walls and floors. Use a moisture meter to measure the moisture levels in different areas. Address any leaks or drainage issues before proceeding with the vapor barrier installation to prevent trapping moisture inside the structure, which could lead to further damage and mold growth.
Ensuring a Clean Surface:
A clean, debris-free surface is essential for the vapor barrier to adhere properly. Clear the area of any dust, dirt, or loose materials. Sweep or vacuum the floor and wipe down walls to remove any contaminants. If necessary, use a mild detergent solution to clean stubborn spots, ensuring the surface is completely dry before installation. This step ensures that the vapor barrier will adhere correctly and provide an effective seal against moisture.
Gathering Necessary Tools and Materials
List of Tools:
To install a vapor barrier effectively, gather the following tools:
- Utility Knife: For cutting the vapor barrier material to the required size and shape.
- Staple Gun: To secure the barrier to wooden studs, joists, or other structural elements.
- Measuring Tape: To measure the dimensions of the area accurately.
- Seam Roller: To smooth out seams and ensure a tight seal between overlapping sections of the barrier.
- Caulking Gun: For applying adhesive or sealant around edges and seams to enhance moisture protection.
- Straight Edge or Ruler: To guide cuts and ensure straight, even edges.
Safety Equipment:
Safety is paramount when installing a vapor barrier. Equip yourself with the following safety gear:
- Gloves: To protect your hands from cuts, abrasions, and irritation from the barrier material.
- Safety Glasses: To shield your eyes from dust and debris during installation.
- Dust Mask or Respirator: To prevent inhalation of dust, especially in enclosed or poorly ventilated spaces.
- Knee Pads: For comfort and protection if you'll be working on your knees for extended periods.
By assessing the area and gathering the necessary tools and materials, you lay the foundation for a successful vapor barrier installation. Proper preparation ensures that the vapor barrier will function effectively, protecting your building from moisture damage and contributing to a healthy, long-lasting structure.
Step-by-Step Guide to Installing Vapor Barriers
Proper installation of vapor barriers is crucial for effective moisture control in buildings. This step-by-step guide will help you through the process, ensuring that you achieve a secure and effective installation.
Measuring and Cutting the Vapor Barrier
Tips for Accurate Measurement:
Accurate measurements are essential to ensure that the vapor barrier fits correctly and provides comprehensive coverage. Here are some tips for precise measurement:
- Measure Twice, Cut Once: Double-check your measurements to avoid mistakes that could lead to wasted material or inadequate coverage.
- Use a Measuring Tape: Ensure that you measure the length and width of the area where the vapor barrier will be installed. Include allowances for overlaps, typically about 6 inches.
- Mark Your Measurements: Use a pencil or marker to indicate measurements on the vapor barrier material before cutting. This will help you cut straight lines and avoid errors.
Techniques for Cutting Materials:
Cutting vapor barrier materials correctly ensures a snug fit and effective moisture control. Here’s how to do it:
- Use a Straight Edge: Place a straight edge along the marked line to guide your utility knife. This helps to achieve a straight, even cut.
- Sharp Utility Knife: Ensure your utility knife blade is sharp to make clean cuts through the material. Replace the blade if it becomes dull.
- Cut on a Flat Surface: Lay the vapor barrier material on a flat, stable surface before cutting. This provides better control and accuracy.
Securing the Vapor Barrier to the Structure
Methods for Walls, Floors, and Ceilings:
Securing the vapor barrier properly ensures it remains in place and performs effectively. Here are methods for different parts of the structure:
- Walls: Start from the top and work your way down, ensuring that the vapor barrier is smooth and free of wrinkles. Use a seam roller to press out any air bubbles.
- Floors: Lay the vapor barrier flat on the floor, making sure it covers the entire area without gaps. Use adhesive in corners and along edges for extra security.
- Ceilings: Installing on ceilings can be challenging due to gravity. Use temporary tacks to hold the material in place while you secure it permanently.
Using Staples vs. Adhesive:
Choosing the right method to secure the vapor barrier depends on the structure and the specific requirements of the installation:
Staples: Use a staple gun to attach the vapor barrier to wooden studs, joists, or other structural elements. Staples provide quick and secure attachment, especially useful on walls and ceilings. Ensure staples are placed every 6-8 inches along the edges and seams.
Adhesive: For non-wooden surfaces or where a more continuous seal is needed, use a construction adhesive or caulk. Apply a bead of adhesive along the edges and seams, then press the vapor barrier firmly into place. Adhesive is particularly effective on floors and in areas where a tight seal is critical.
By following these steps, you can ensure that your vapor barrier is installed correctly, providing effective moisture control and enhancing the durability and comfort of your building.
Addressing Common Issues During Installation
Proper installation of vapor barriers can be challenging due to various obstacles and the need for precise techniques. This section addresses common issues encountered during installation and provides solutions to ensure a seamless and effective vapor barrier.
Dealing with Overlaps and Seams
Proper Techniques for Overlapping: Overlapping is crucial to ensure that there are no gaps in the vapor barrier where moisture can penetrate. Here are the best practices for overlapping:
- Sufficient Overlap: Ensure that each section of the vapor barrier overlaps the adjacent section by at least 6 inches. This overlap helps maintain a continuous barrier against moisture.
- Staggered Seams: When installing multiple layers, stagger the seams to avoid aligning them. This technique adds an extra layer of protection by reducing the risk of gaps.
Sealing Seams Effectively: Sealing the seams correctly is vital for preventing moisture infiltration. Follow these steps to ensure a tight seal:
- Use Appropriate Tape: Use a high-quality vapor barrier tape designed for sealing seams. This tape should be durable and adhere well to the vapor barrier material.
- Clean Surface: Before applying tape, ensure that the surface is clean and free of dust or debris to maximize adhesion.
- Press Firmly: Apply the tape along the seam and press down firmly to ensure a secure bond. Use a seam roller to smooth out the tape and eliminate any air bubbles.
Handling Obstructions and Irregular Surfaces
Working Around Pipes and Electrical Outlets: Obstructions such as pipes and electrical outlets can complicate the installation process. Here’s how to address these challenges:
- Cutting for Pipes: Measure and mark the position of the pipes on the vapor barrier. Cut a slit or a small circle in the barrier to fit around the pipe. Use tape or an adhesive to seal the cut edges tightly around the pipe.
- Fitting Around Electrical Outlets: Measure the location of the outlets and cut an appropriate-sized hole in the vapor barrier. Ensure the barrier fits snugly around the outlet. Use tape to secure the edges around the outlet box, ensuring there are no gaps.
Ensuring Complete Coverage: Irregular surfaces and corners require careful attention to ensure complete coverage of the vapor barrier. Follow these tips:
- Flexible Materials: Use vapor barrier materials that are flexible enough to conform to irregular surfaces. This flexibility helps in achieving a tight fit without gaps.
- Multiple Pieces: For large or complex areas, use multiple pieces of vapor barrier material to cover the surface completely. Overlap and seal the seams between pieces to ensure continuous coverage.
- Detailed Inspection: After installation, inspect the entire area to ensure there are no gaps, wrinkles, or loose edges. Pay special attention to corners, edges, and areas around obstructions.
By addressing these common issues during vapor barrier installation, you can ensure that your barrier is effective in preventing moisture infiltration, maintaining the integrity and longevity of your building.
Ensuring the Effectiveness of Your Vapor Barrier
The effectiveness of your vapor barrier is crucial for maintaining a moisture-free environment in your building. Proper inspection and maintenance are essential to ensure that the vapor barrier performs its function over time. This section provides detailed guidance on how to inspect your work and maintain the vapor barrier for long-term effectiveness.
Inspecting Your Work
Checking for Gaps and Loose Edges: After installing the vapor barrier, a thorough inspection is necessary to identify any potential weaknesses. Follow these steps:
- Visual Inspection: Carefully examine the entire surface of the vapor barrier for any visible gaps, wrinkles, or loose edges. Pay close attention to corners, seams, and areas around obstructions such as pipes and electrical outlets.
- Touch Test: Run your hands along the edges and seams to feel for any areas that might not be securely attached. Loose edges can lead to air and moisture infiltration, compromising the barrier's effectiveness.
- Use a Flashlight: In low-light conditions, use a flashlight to shine along the seams and edges. Shadows cast by gaps or loose edges will be more visible, making it easier to identify problem areas.
Ensuring Tight Seals: A tight seal is critical for the vapor barrier to function effectively. Here's how to ensure all seals are secure:
- Recheck Seams: Ensure that all seams are properly overlapped and sealed with high-quality vapor barrier tape. Press the tape firmly and use a seam roller to eliminate air bubbles and ensure a strong bond.
- Seal Around Obstructions: Double-check areas around pipes, outlets, and other obstructions. Make sure that any cuts or openings made to accommodate these features are tightly sealed with tape or adhesive.
- Edge Sealing: Ensure that the edges of the vapor barrier are securely fastened to the structure, whether using staples or adhesive. There should be no loose or flapping sections that could allow moisture to penetrate.
Maintenance Tips
Regular Inspections: Regular inspections are vital to maintain the integrity of the vapor barrier over time. Follow these maintenance practices:
- Scheduled Checks: Conduct inspections at least twice a year, preferably in the spring and fall, to check for any signs of wear or damage.
- Post-Event Inspections: After any significant weather events, such as heavy rain or storms, inspect the vapor barrier to ensure it hasn't been compromised.
Repairing Damage Promptly: Addressing any damage to the vapor barrier quickly is essential to prevent moisture problems. Here’s how to handle repairs:
- Identify Damage: Look for signs of damage such as tears, punctures, or areas where the barrier has become detached from the structure.
- Use Proper Materials: Repair any damage using the same high-quality vapor barrier tape or adhesive used during installation. For larger tears, cut a piece of new vapor barrier material to cover the damaged area, ensuring it overlaps the existing barrier by at least 6 inches on all sides.
- Secure Repairs: Tape or glue the new piece securely, pressing firmly to ensure a tight seal. Use a seam roller to smooth out the repair and eliminate air bubbles.
By following these inspection and maintenance tips, you can ensure the long-term effectiveness of your vapor barrier, protecting your building from moisture damage and preserving its structural integrity. Regular care and prompt repairs will keep your vapor barrier performing optimally, providing peace of mind and a healthy living environment.
FAQs
Contact Crawl Logic Today!
Crawl Logic will do everything we can to ensure your experience with us is excellent.
Request A FREE Estimate
CHECKOUT RECENT POST


Schedule Your FREE Crawl Space Evaluation!
Did you know YOU DON'T HAVE TO BE HOME for us to provide you with your 100% FREE crawl space inspection and report?
CHOOSE THE BEST OPTION, CRAWL LOGIC!
Ready to Elevate Your Experience? Let's embark on a journey to success together! Our team is dedicated to delivering excellence and innovation tailored to your unique needs. Connect with us now to discover how our services can transform your vision into reality. Your next big leap starts here
Crawl Logic - Franklin Crawl Space Encapsulation and Repair
COMPANY INFO
Address: Franklin, Tennessee, United States
Email:
joshuamaynor1988@gmail.com
Phone: 615-257-9772
Office: 615-540-2278
HOURS
Monday: 8:00AM - 5:00PM
Tuesday: 8:00AM - 5:00PM
Wednesday: 8:00AM - 5:00PM
Thursday: 8:00AM - 5:00PM
Friday: 8:00AM - 5:00PM
Saturday: CLOSED
Sunday: CLOSED
Copyright © 2020 Crawl Logic - Franklin Crawl Space Encapsulation and Repair