
Installing a vapor barrier under laminate flooring is a crucial step in protecting your floors and ensuring their longevity. Laminate flooring is a popular choice for its aesthetic appeal, durability, and ease of maintenance. However, without proper moisture control, laminate floors can be susceptible to damage from moisture infiltration, leading to warping, mold growth, and other issues.
A vapor barrier serves as an essential defense against moisture, preventing water vapor from seeping through the subfloor and reaching the laminate. This not only preserves the structural integrity of the flooring but also enhances the overall indoor air quality by reducing the risk of mold and mildew. Whether you are installing laminate flooring in a basement, on a ground floor, or any area prone to moisture, incorporating a vapor barrier is a best practice that can save you from costly repairs and health concerns down the line.
In this blog, we will guide you through the process of installing a vapor barrier under laminate flooring. From selecting the right materials to step-by-step installation techniques, you will learn how to effectively protect your laminate floors from moisture damage. By following these guidelines, you can ensure a smooth installation process and enjoy the benefits of a well-protected and long-lasting laminate floor. Join us as we explore the essentials of vapor barrier installation and help you create a more durable and comfortable living space.
Preparing for Vapor Barrier Installation
Proper preparation is essential for a successful vapor barrier installation under laminate flooring. By thoroughly assessing the subfloor, gathering the necessary tools and materials, and following safety precautions, you can ensure a smooth and effective installation process. This section will guide you through the critical steps to prepare for vapor barrier installation.
Assessing the Subfloor
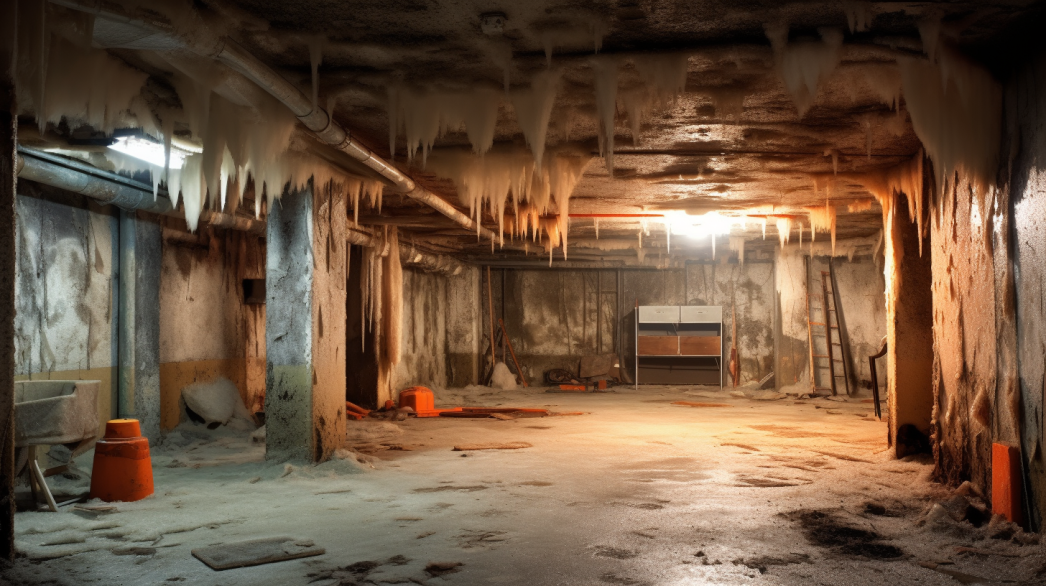
Checking for Moisture Issues: Before installing a vapor barrier, it's crucial to check the subfloor for any existing moisture problems. Moisture can lead to mold growth and damage to both the subfloor and the laminate flooring.
- Moisture Testing: Use a moisture meter to measure the moisture content of the subfloor. Acceptable moisture levels vary depending on the material, but generally, levels should be below 12% for wood subfloors and less than 5% for concrete subfloors.
- Visual Inspection: Look for visible signs of moisture, such as dark spots, mold, or mildew. Pay special attention to areas around pipes, windows, and exterior walls, where moisture problems are more likely to occur.
- Address Moisture Sources: If moisture issues are detected, address the source of the moisture before proceeding. This might involve repairing leaks, improving drainage, or using a dehumidifier to dry out the area.
Ensuring the Subfloor is Clean and Dry: A clean and dry subfloor is essential for the vapor barrier to adhere properly and function effectively.
- Cleaning: Sweep or vacuum the subfloor to remove dust, dirt, and debris. Use a mild detergent solution to clean any stubborn stains or spills, ensuring the surface is free of contaminants.
- Drying: Allow the subfloor to dry completely before installation. If the subfloor has been recently cleaned or if there were any moisture issues, give it ample time to dry to avoid trapping moisture under the vapor barrier.
Gathering Necessary Tools and Materials
List of Tools: To install a vapor barrier efficiently, gather the following tools:
- Utility Knife: For cutting the vapor barrier material to the required size and shape.
- Tape Measure: To measure the dimensions of the subfloor accurately.
- Straight Edge or Ruler: To guide cuts and ensure straight, even edges.
- Staple Gun: For securing the vapor barrier to wooden subfloors, if necessary.
- Seam Roller: To smooth out seams and ensure a tight seal between overlapping sections of the barrier.
- Scissors: For making precise cuts around obstacles or in tight spaces.
List of Materials: Ensure you have all the necessary materials before starting the installation:
- Vapor Barrier Material: Choose high-quality polyethylene sheets or other suitable vapor barrier materials designed for use under laminate flooring.
- Adhesive Tape: Use durable vapor barrier tape for sealing seams and edges, ensuring a continuous barrier.
- Sealant or Adhesive: Select an appropriate sealant for securing the vapor barrier to the subfloor, particularly around edges and obstacles.
- Underlayment (if required): Some laminate flooring installations may require an additional underlayment for added comfort and noise reduction.
Safety Precautions
Wearing Appropriate Protective Gear: Safety should always be a priority during any home improvement project
.
- Gloves: Protect your hands from cuts, abrasions, and irritation from the barrier material.
- Safety Glasses: Shield your eyes from dust, debris, and any flying particles during installation.
- Dust Mask or Respirator: Prevent inhalation of dust and fumes from adhesives, especially in enclosed or poorly ventilated spaces.
- Knee Pads: Provide comfort and protection if you need to work on your knees for extended periods.
Ensuring Proper Ventilation: Adequate ventilation is essential for a safe working environment, particularly when using adhesives or sealants.
- Ventilation: Open windows and doors to ensure good airflow in the working area. Use fans to enhance ventilation and disperse any fumes from adhesives or sealants.
- Workspace Organization: Keep the workspace organized and free of clutter to minimize hazards and ensure easy access to tools and materials.
By carefully assessing the subfloor, gathering the necessary tools and materials, and following safety precautions, you can lay the groundwork for a successful vapor barrier installation. Proper preparation ensures that the vapor barrier will function effectively, protecting your laminate flooring from moisture damage and enhancing the durability and comfort of your living space.
Selecting the Appropriate Vapor Barrier
Choosing the right vapor barrier for your laminate flooring installation is crucial to ensure effective moisture control and long-term durability. This section will guide you through the different types of vapor barriers and the key factors to consider when selecting the most suitable option for your project.
Types of Vapor Barriers
Permeable vs. Impermeable Barriers: Understanding the difference between permeable and impermeable vapor barriers is essential for making an informed choice.
- Permeable Barriers: Also known as vapor retarders, permeable barriers allow some moisture to pass through. They are designed to control, rather than completely block, moisture. These barriers are typically used in climates where it's beneficial to let the building breathe and where there is a lower risk of high moisture levels. However, permeable barriers are generally not recommended for use under laminate flooring due to the sensitivity of laminate to moisture.
- Impermeable Barriers: Impermeable vapor barriers block almost all moisture from passing through. They are essential for protecting laminate flooring from moisture damage, especially in areas with high humidity or where there is a significant risk of moisture infiltration. Common materials for impermeable barriers include polyethylene sheets and foil-backed materials.
Suitable Materials for Laminate Flooring: When selecting a vapor barrier for laminate flooring, the material must be effective in preventing moisture while being compatible with the flooring type.
- Polyethylene Sheets: High-density polyethylene (HDPE) sheets are a popular choice for laminate flooring installations. They are durable, flexible, and provide excellent moisture resistance. Polyethylene sheets are available in various thicknesses, typically ranging from 6 mils to 20 mils.
- Foil-Backed Materials: Foil-backed vapor barriers offer the added benefit of reflecting radiant heat, which can enhance energy efficiency. These barriers are also impermeable and provide robust protection against moisture.
- Combination Underlayment: Some underlayments come with an integrated vapor barrier layer. These combination products simplify the installation process by providing both cushioning and moisture protection in a single layer.
Factors to Consider
Climate and Regional Considerations: The climate and regional conditions of your area significantly influence the choice of vapor barrier.
- High Humidity Areas: In regions with high humidity or frequent rainfall, an impermeable vapor barrier is essential to protect the laminate flooring from moisture damage. Polyethylene sheets or foil-backed barriers are ideal for these conditions.
- Dry Climates: In drier climates, the moisture risk is lower, but it's still crucial to provide a vapor barrier to protect against potential spills or minor moisture intrusion. A thinner polyethylene sheet may suffice.
- Seasonal Variations: Areas with significant seasonal humidity changes require a vapor barrier that can handle fluctuations. An impermeable barrier is generally the best choice to provide consistent protection throughout the year.
Compatibility with Laminate Flooring: Ensuring that the vapor barrier is compatible with your laminate flooring is critical for effective installation and performance.
- Manufacturer Recommendations: Always check the laminate flooring manufacturer's guidelines for recommended vapor barrier types and installation practices. Using a barrier that meets or exceeds these recommendations ensures optimal protection and maintains the flooring warranty.
- Subfloor Type: Consider the type of subfloor when selecting a vapor barrier. Concrete subfloors, for example, are more prone to moisture and require a robust impermeable barrier. Wooden subfloors may also benefit from a vapor barrier to prevent moisture migration from below.
- Installation Method: The installation method of the laminate flooring (floating, glued, or nailed) may affect the choice of vapor barrier. Floating floors, which are common with laminate, work well with polyethylene sheets laid directly over the subfloor.
By considering the types of vapor barriers and the specific factors relevant to your climate and flooring, you can select the most appropriate vapor barrier for your laminate flooring installation. This careful selection process ensures effective moisture control, protecting your flooring and enhancing the overall durability and comfort of your home.
Accurate Measurement and Cutting Techniques
Proper measurement and cutting of the vapor barrier material are crucial steps in ensuring a successful installation under laminate flooring. Accurate measurements prevent waste and ensure complete coverage, while clean cuts help maintain the integrity and effectiveness of the barrier. This section provides detailed guidance on measuring your space and cutting the vapor barrier material correctly.
Measuring Your Space
Taking Precise Measurements of the Room: Accurate measurements are the foundation of a successful vapor barrier installation. Follow these steps to measure your space precisely:
- Use a Measuring Tape: Start with a reliable measuring tape to measure the length and width of the room. Ensure the tape measure is straight and taut to get accurate readings.
- Measure Multiple Points: Measure the dimensions at multiple points along each wall to account for any variations in the room’s shape. This is especially important in older homes where walls may not be perfectly straight.
- Record Measurements: Write down all measurements clearly, noting any differences and creating a sketch of the room if necessary. This sketch will help you plan the layout of the vapor barrier material.
Accounting for Obstacles and Irregularities: Rooms often have various obstacles and irregularities that must be accounted for during measurement.
- Identify Obstacles: Take note of any obstacles such as doorways, pipes, vents, and permanent fixtures. Measure the dimensions and locations of these obstacles relative to the walls and floor.
- Allow for Overlaps: Plan for overlaps of at least 6 inches between sheets of vapor barrier material. Include these overlaps in your measurements to ensure there are no gaps in coverage.
- Adjust for Irregularities: If the room has irregular shapes or corners, measure these areas carefully. Consider how the vapor barrier will need to be cut to fit snugly around these irregularities, ensuring complete coverage.
Cutting the Vapor Barrier Material
Using the Right Tools for Clean Cuts: Proper tools are essential for making clean, accurate cuts in the vapor barrier material.
- Utility Knife: Use a sharp utility knife for cutting polyethylene sheets and other barrier materials. A sharp blade ensures clean cuts without fraying the edges.
- Straight Edge or Ruler: Use a straight edge or a metal ruler to guide your cuts. This helps maintain straight, even lines and prevents the material from shifting during cutting.
- Cutting Surface: Lay the vapor barrier material on a flat, stable surface before cutting. This provides better control and accuracy, reducing the risk of mistakes.
Tips for Handling Large Sheets of Material: Handling large sheets of vapor barrier material can be challenging, but these tips can help:
- Roll Out the Material: Roll out the vapor barrier material fully before measuring and cutting. This allows you to see the entire sheet and plan your cuts more effectively.
- Secure the Material: Use weights or clamps to hold the material in place on the cutting surface. This prevents it from moving while you measure and cut.
- Make Multiple Cuts: For large areas, it may be easier to make multiple smaller cuts rather than trying to handle one large sheet. Measure and cut each section individually, ensuring that each piece overlaps the adjacent one by at least 6 inches.
- Fold and Cut: If space is limited, fold the material carefully along your measured lines and cut through the fold. This technique can help manage large sheets in confined spaces.
By following these accurate measurement and cutting techniques, you can ensure that your vapor barrier fits perfectly under your laminate flooring. Properly measured and cut material will provide effective moisture protection, contributing to the durability and comfort of your flooring installation.
Step-by-Step Guide to Installing the Vapor Barrier
Installing a vapor barrier under laminate flooring is a meticulous process that requires careful preparation and precise execution. This step-by-step guide will walk you through the essential stages, from preparing the subfloor to securing the vapor barrier, ensuring a successful and durable installation.
Preparing the Subfloor
Cleaning and Drying the Subfloor: A clean and dry subfloor is crucial for the vapor barrier to adhere properly and function effectively.
- Cleaning: Begin by thoroughly sweeping or vacuuming the subfloor to remove all dust, dirt, and debris. Pay special attention to corners and edges where debris tends to accumulate. For stubborn stains or spills, use a mild detergent solution and a damp mop or cloth. Rinse the area with clean water and allow it to dry completely.
- Drying: Ensure the subfloor is completely dry before proceeding. Any moisture present can compromise the vapor barrier's effectiveness. Use fans or dehumidifiers to speed up the drying process if necessary. If the subfloor has been recently cleaned or if there were any moisture issues, allow additional drying time.
Repairing Any Damage: Addressing any subfloor damage before installing the vapor barrier is essential for a smooth and secure installation.
- Inspect for Damage: Carefully inspect the subfloor for any cracks, holes, or uneven areas. Pay attention to signs of wear and tear, such as loose boards or tiles.
- Repair Damage: Fill any cracks or holes with an appropriate filler or sealant and allow it to cure completely. Sand down any rough or uneven areas to create a smooth surface. For wooden subfloors, secure any loose boards with nails or screws to prevent movement that could damage the vapor barrier.
Laying Out the Vapor Barrier
Starting at One Corner of the Room: Proper positioning of the vapor barrier is crucial for ensuring full coverage and effective moisture protection.
- Choose a Starting Point: Begin in one corner of the room and work your way across. Starting in a corner allows you to lay the barrier in a straight line, ensuring proper alignment.
- Align the Edge: Position the first sheet of vapor barrier material so that it aligns with the wall or floor edge. Ensure that the sheet is flush with the corner to avoid gaps.
Rolling Out the Barrier Smoothly: Smoothly rolling out the vapor barrier helps prevent wrinkles and ensures a tight fit.
- Roll Out Gradually: Unroll the vapor barrier material slowly, smoothing it out as you go. Use your hands or a seam roller to press out any air bubbles or wrinkles.
- Overlap Sections: If multiple sheets are required, overlap each section by at least 6 inches to ensure a continuous barrier. Align the edges carefully to maintain a straight line and consistent overlap.
Securing the Vapor Barrier
Stapling or Taping Edges to the Subfloor: Securing the edges of the vapor barrier is essential to prevent it from shifting and to maintain an effective seal.
- Stapling: For wooden subfloors, use a staple gun to secure the vapor barrier along the edges. Place staples every 6-8 inches to ensure a firm hold. Ensure the staples are fully inserted and lie flat against the material.
- Taping: Use vapor barrier tape to secure the edges of the barrier. Apply the tape along the entire length of each seam and press down firmly to ensure a tight seal. A seam roller can help eliminate air bubbles and improve adhesion.
Ensuring a Tight Fit with No Gaps: A tight fit with no gaps ensures the vapor barrier effectively prevents moisture infiltration.
- Check for Gaps: After securing the vapor barrier, inspect the entire surface for any gaps, wrinkles, or loose edges. Pay special attention to corners, seams, and areas around obstacles.
- Reinforce as Needed: If any gaps or loose areas are found, reinforce them with additional tape or staples. Ensure that all seams are tightly sealed and that the barrier is flush against the subfloor.
By following this step-by-step guide, you can ensure a successful vapor barrier installation under your laminate flooring. Proper preparation, precise layout, and secure attachment of the vapor barrier are crucial for effective moisture control, protecting your flooring, and enhancing the durability and comfort of your home.
Proper Techniques for Overlapping and Seaming
Ensuring proper overlapping and seaming of vapor barrier sheets is essential for maintaining an effective moisture barrier under laminate flooring. This section provides detailed instructions on how to overlap sheets correctly and securely seal the seams to create a continuous and reliable barrier.
Overlapping Sheets of Vapor Barrier
How Much to Overlap: Proper overlap between sheets of vapor barrier material is crucial to prevent gaps where moisture could penetrate.
- Standard Overlap: It is recommended to overlap each sheet of vapor barrier material by at least 6 inches. This ensures that there is enough overlap to create a continuous barrier, reducing the risk of gaps or leaks.
- Consistent Overlap: Ensure that the overlap is consistent along the entire length of the seam. Any variation in the overlap can create weak points where moisture might enter.
Securing Overlaps with Tape: Securing the overlaps properly is vital to maintain the integrity of the vapor barrier.
- Use High-Quality Tape: Select a high-quality vapor barrier tape designed specifically for this purpose. This tape should be strong, moisture-resistant, and have excellent adhesive properties.
- Press Firmly: Apply the tape along the overlap seam, pressing down firmly to ensure it adheres well to both sheets. Use a seam roller to press the tape down and eliminate any air bubbles, ensuring a tight bond.
- Check Adhesion: After applying the tape, inspect the seam to ensure there are no loose areas. Press down any sections that are not fully adhered to maintain a continuous seal.
Sealing the Seams
Using Appropriate Adhesive Tape: The choice of adhesive tape is critical for sealing the seams effectively.
- Select Suitable Tape: Use a tape that is specifically designed for vapor barriers. This tape should be durable, waterproof, and have a strong adhesive to ensure a lasting seal.
- Wide Tape: Opt for wider tape (at least 3 inches wide) to cover the entire seam and provide extra security against moisture penetration.
Ensuring a Continuous Barrier: Creating a continuous barrier with no gaps or breaks is essential for effective moisture control.
- Apply Tape Along Seams: Lay the tape along the entire length of each seam, ensuring it covers the overlap completely. Press the tape down firmly as you go, using a seam roller to ensure a tight seal.
- Inspect Seams: After sealing all seams, inspect them carefully to ensure there are no gaps, wrinkles, or loose edges. A continuous, smooth seam is vital for preventing moisture from penetrating the barrier.
- Reinforce as Necessary: If any areas appear weak or not fully sealed, apply additional tape or adhesive to reinforce these sections. Ensure that the barrier is completely sealed and continuous across the entire floor.
By following these proper techniques for overlapping and seaming vapor barrier sheets, you can ensure a reliable and effective moisture barrier under your laminate flooring. Consistent overlap and secure seam sealing are key to maintaining the integrity of the vapor barrier, protecting your flooring from moisture damage, and ensuring a durable and comfortable living space.
FAQs
Contact Crawl Logic Today!
Crawl Logic will do everything we can to ensure your experience with us is excellent.
Request A FREE Estimate
CHECKOUT RECENT POST

Schedule Your FREE Crawl Space Evaluation!
Did you know YOU DON'T HAVE TO BE HOME for us to provide you with your 100% FREE crawl space inspection and report?
CHOOSE THE BEST OPTION, CRAWL LOGIC!
Ready to Elevate Your Experience? Let's embark on a journey to success together! Our team is dedicated to delivering excellence and innovation tailored to your unique needs. Connect with us now to discover how our services can transform your vision into reality. Your next big leap starts here
Crawl Logic - Franklin Crawl Space Encapsulation and Repair
COMPANY INFO
Address: Franklin, Tennessee, United States
Email:
joshuamaynor1988@gmail.com
Phone: 615-257-9772
Office: 615-540-2278
HOURS
Monday: 8:00AM - 5:00PM
Tuesday: 8:00AM - 5:00PM
Wednesday: 8:00AM - 5:00PM
Thursday: 8:00AM - 5:00PM
Friday: 8:00AM - 5:00PM
Saturday: CLOSED
Sunday: CLOSED
Copyright © 2020 Crawl Logic - Franklin Crawl Space Encapsulation and Repair