
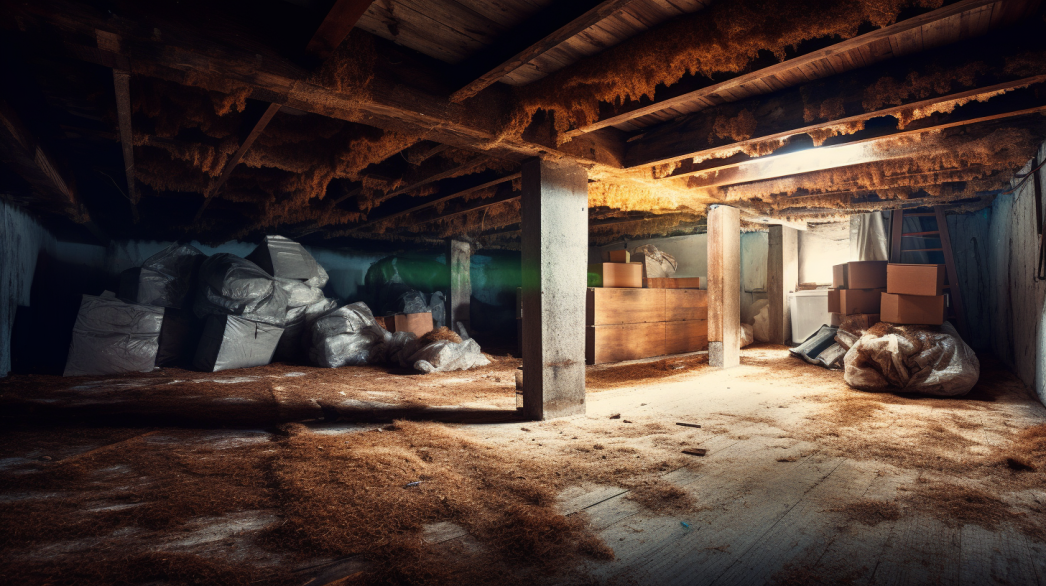
Moisture control in roofs and ceilings is a critical aspect of building maintenance and construction that significantly impacts the longevity, safety, and energy efficiency of a structure. Proper moisture management helps prevent a range of problems, from structural damage and mold growth to energy inefficiency and poor indoor air quality. Understanding and implementing effective moisture control measures can protect your building from the detrimental effects of moisture infiltration.
Preventing Structural Damage
Excess moisture in roofs and ceilings can lead to severe structural damage over time. Water can weaken wooden beams, cause metal components to rust, and degrade roofing materials, leading to leaks and compromised structural integrity. By controlling moisture, you can prevent these issues and maintain the strength and stability of your building's roof and ceiling structures.
Avoiding Mold and Mildew Growth
Moist environments are ideal for the growth of mold and mildew, which can pose significant health risks to occupants, including respiratory problems and allergic reactions. Moisture control measures, such as installing vapor barriers and ensuring proper ventilation, can help prevent mold and mildew from developing in roofs and ceilings. This not only protects the health of the building's occupants but also preserves the aesthetic and structural qualities of the interior spaces.
Enhancing Energy Efficiency
Moisture can reduce the effectiveness of insulation in roofs and ceilings, leading to increased heating and cooling costs. When insulation becomes damp, its thermal resistance decreases, causing indoor temperatures to fluctuate more and forcing HVAC systems to work harder. By keeping roofs and ceilings dry, you ensure that insulation remains effective, thereby enhancing the building's energy efficiency and reducing utility bills.
Maintaining Indoor Air Quality
Moisture infiltration can negatively impact indoor air quality by promoting the growth of mold and mildew and by allowing outdoor pollutants to enter the building. Proper moisture control helps maintain a healthy indoor environment by preventing these issues. This is especially important in spaces where people spend a significant amount of time, such as homes, offices, and schools.
Prolonging the Lifespan of Building Materials
Building materials in roofs and ceilings are often costly to repair or replace. Effective moisture control extends the lifespan of these materials by preventing water damage and degradation. This not only saves money on repairs and replacements but also contributes to the overall sustainability of the building by reducing the need for new materials.
In summary, moisture control in roofs and ceilings is essential for protecting the structural integrity, health, and efficiency of a building. Implementing effective moisture management strategies ensures that your building remains safe, durable, and comfortable for its occupants.
What is a Vapor Barrier and Why You Need One
Understanding Vapor Barriers
Definition and Primary Function A vapor barrier is a material used in building construction to prevent water vapor from diffusing through walls, floors, ceilings, and roofs. Its primary function is to control moisture levels within the building envelope, protecting against the detrimental effects of condensation and moisture infiltration. By blocking water vapor from penetrating the building materials, vapor barriers help maintain a dry and stable environment, which is essential for the durability and health of the structure.
Common Materials Used Vapor barriers are typically made from materials with low permeability to ensure effective moisture control. The most common materials include:
- Polyethylene Sheets: These plastic sheets are widely used due to their durability, flexibility, and excellent moisture resistance. They are available in various thicknesses, typically ranging from 6 mils to 20 mils, depending on the level of protection needed.
- Foil-Faced Barriers: These barriers combine a layer of aluminum foil with other materials, such as paper or plastic. The foil not only provides a strong vapor barrier but also reflects radiant heat, offering additional thermal insulation benefits.
- Self-Adhesive Membranes: These are easy to apply and ensure a tight seal. They are particularly useful in complex areas and provide a continuous barrier without the need for mechanical fasteners.
Benefits of Vapor Barriers for Roofs and Ceilings
Moisture Prevention: Protecting Against Water Damage and Mold One of the primary benefits of vapor barriers in roofs and ceilings is their ability to prevent moisture from penetrating the building envelope. Moisture infiltration can lead to a host of problems, including water damage, mold growth, and mildew, which can compromise the structural integrity and health of the building. By installing vapor barriers, you create an effective shield that blocks water vapor, keeping the interior spaces dry and free from moisture-related issues. This protection is crucial in maintaining the longevity of roofing materials and the overall safety of the building's occupants.
Energy Efficiency: Enhancing Insulation and Reducing Costs Vapor barriers play a significant role in enhancing the energy efficiency of a building. Moisture can degrade insulation materials, reducing their effectiveness and leading to increased heating and cooling costs. When insulation remains dry, it maintains its thermal resistance, providing better temperature regulation and reducing the workload on HVAC systems. By preventing moisture infiltration, vapor barriers help ensure that insulation performs optimally, leading to lower energy consumption and reduced utility bills. This improved energy efficiency not only saves money but also contributes to a more sustainable and environmentally friendly building.
Structural Integrity: Extending the Lifespan of Roofing and Ceiling Structures The structural integrity of roofs and ceilings is crucial for the overall stability and durability of a building. Moisture can cause significant damage to structural components, such as wooden beams, metal supports, and roofing materials. Over time, this can lead to rot, rust, and deterioration, compromising the safety and functionality of the building. Vapor barriers help protect these critical components by preventing moisture from entering and causing damage. By maintaining a dry environment, vapor barriers extend the lifespan of roofing and ceiling structures, reducing the need for frequent repairs and replacements and ensuring long-term performance and reliability.
In conclusion, vapor barriers are an essential component in building construction, particularly for roofs and ceilings. They offer numerous benefits, including effective moisture prevention, enhanced energy efficiency, and improved structural integrity. By understanding the importance of vapor barriers and selecting the right materials for your building, you can protect your investment and ensure a safe, durable, and energy-efficient environment.
Getting Ready: Preparing for Installation
Initial Assessment
Checking for Existing Moisture Issues Before installing a vapor barrier, it is crucial to conduct a thorough assessment for any existing moisture issues in the roof and ceiling areas. Start by inspecting the area for visible signs of moisture, such as water stains, mold, mildew, or damp spots. Use a moisture meter to measure the moisture content in the roof and ceiling materials. High readings may indicate underlying moisture problems that need to be addressed before proceeding with the vapor barrier installation. Identifying and mitigating these issues is essential to ensure the effectiveness of the vapor barrier and to prevent further damage to the building structure.
Importance of a Clean and Dry Surface A clean and dry surface is fundamental for the successful installation of a vapor barrier. Dust, dirt, and debris can interfere with the adhesion of the barrier, leading to gaps that allow moisture to penetrate. Thoroughly clean the roof and ceiling surfaces using appropriate cleaning tools, such as brooms, vacuums, or damp cloths, to remove all contaminants. Allow the surfaces to dry completely before starting the installation process. Ensuring that the surfaces are free of moisture and debris helps create a solid foundation for the vapor barrier, maximizing its effectiveness and longevity.
Choosing the Right Vapor Barrier
Types Suitable for Roofs and Ceilings Selecting the appropriate type of vapor barrier is critical for effective moisture control in roofs and ceilings. Several options are particularly suitable for these areas:
- Polyethylene Sheets: These plastic sheets are highly durable and provide excellent moisture resistance. They are flexible, easy to install, and available in various thicknesses to suit different levels of protection needs.
- Foil-Faced Barriers: These barriers combine aluminum foil with other materials, offering both moisture resistance and thermal insulation. The reflective properties of foil-faced barriers help reduce radiant heat transfer, making them ideal for use in attics and ceilings.
- Self-Adhesive Membranes: These barriers are easy to apply and ensure a tight seal around complex areas. Self-adhesive membranes provide a continuous barrier without the need for mechanical fasteners, making them suitable for roofs with intricate designs.
Considerations for Thickness, Permeability, and Durability When choosing a vapor barrier for roofs and ceilings, consider the following factors to ensure optimal performance:
- Thickness: The thickness of the vapor barrier affects its durability and effectiveness. Thicker barriers (e.g., 10 to 15 mils) offer enhanced protection and are more resistant to punctures and tears. For areas with high moisture levels or extreme weather conditions, thicker barriers are recommended.
- Permeability: The permeability of a vapor barrier, measured in perms, indicates how easily water vapor can pass through the material. For effective moisture control, choose barriers with low permeability ratings (less than 1 perm). This ensures that the barrier effectively blocks moisture from entering the building envelope.
- Durability: The durability of the vapor barrier is essential for long-term performance. Materials like high-density polyethylene or foil-faced barriers offer greater durability and resistance to environmental factors. Consider the specific conditions of the installation area, such as exposure to sunlight, temperature fluctuations, and potential mechanical stress, and select a material that can withstand these conditions.
By carefully assessing existing moisture issues, ensuring a clean and dry surface, and selecting the appropriate vapor barrier based on thickness, permeability, and durability, you can effectively prepare for a successful installation. These steps will provide robust protection against moisture infiltration, safeguarding the structural integrity and energy efficiency of your roofs and ceilings.
Tools and Materials: What You Need
Essential Tools
Utility Knife A utility knife is a critical tool for any vapor barrier installation project. It allows for precise cutting of vapor barrier materials to fit the specific dimensions required for the roof and ceiling areas. A sharp blade ensures clean cuts, minimizing the risk of tearing or creating uneven edges that could compromise the barrier's effectiveness.
Tape Measure Accuracy is crucial when installing a vapor barrier. A tape measure is used to take precise measurements of the roof and ceiling spaces to ensure that the vapor barrier fits correctly and covers the entire area without gaps. Proper measurements help prevent material wastage and ensure a seamless installation.
Stapler or Adhesive Tape To secure the vapor barrier to the roof and ceiling structures, you'll need either a heavy-duty stapler or adhesive tape. A stapler is useful for attaching the vapor barrier to wooden or drywall surfaces, while high-quality adhesive tape can provide a strong bond where stapling is not feasible. Both tools are essential for ensuring the vapor barrier stays in place and functions effectively.
Safety Equipment (Gloves, Mask, Goggles) Safety should always be a priority during installation. Wearing gloves protects your hands from cuts and abrasions while handling sharp tools and materials. A mask is important to prevent inhalation of dust and other particles, especially when working in confined spaces. Goggles protect your eyes from debris and any accidental splashes of adhesive. Using the appropriate safety equipment ensures a safe and efficient installation process.
Required Materials
Vapor Barrier Rolls or Sheets The primary material needed for this project is the vapor barrier itself. Vapor barrier rolls or sheets, typically made from polyethylene or other durable, low-permeability materials, are designed to block moisture from penetrating the roof and ceiling areas. Choose a vapor barrier that matches the size and specifications required for your building to ensure complete coverage. The thickness of the vapor barrier should be appropriate for the level of moisture protection needed.
Sealing Tape or Adhesive Sealing tape or adhesive is crucial for securing the seams and edges of the vapor barrier. High-quality sealing tape ensures that the overlaps between sheets are airtight, preventing moisture from seeping through any gaps. Adhesive may also be needed to attach the vapor barrier to surfaces where stapling is not practical. Both materials help maintain the integrity of the vapor barrier system.
Cleaning Supplies (Broom, Vacuum) Before installing the vapor barrier, it is essential to prepare the roof and ceiling surfaces thoroughly. Cleaning supplies, such as a broom and vacuum, are necessary to remove dust, dirt, and debris from the surfaces. A clean surface ensures better adhesion of the vapor barrier and a more effective installation. Ensuring the area is free of contaminants also helps prevent any potential issues during the installation process.
Ladder or Scaffolding for Roof Access Proper access to the roof is essential for a safe and efficient installation. A sturdy ladder or scaffolding is necessary to reach higher areas and ensure you can work comfortably and securely. Ensure that the ladder or scaffolding is properly set up and stable before beginning the installation process. This equipment helps you reach all parts of the roof and ceiling areas safely, ensuring thorough coverage of the vapor barrier.
By gathering the right tools and materials, you can ensure a smooth and successful installation of a vapor barrier in your roof and ceiling areas. Proper preparation and the use of quality materials will enhance the effectiveness of the vapor barrier, providing long-lasting protection against moisture and maintaining the integrity of your building.
The Art of a Proper Seal
Securing Seams and Edges
Techniques for Overlapping Seams Effectively To achieve a proper seal when installing a vapor barrier, it's crucial to overlap seams correctly. Begin by measuring and cutting the vapor barrier to cover the area, ensuring that each piece overlaps the adjacent one by at least 6 inches. This overlap provides a buffer zone that helps prevent moisture from penetrating the barrier. Lay the sheets or rolls of vapor barrier so that the edges align smoothly, avoiding wrinkles and gaps. Press the overlapping sections together firmly to ensure they are flush and secure before applying sealing tape. This method creates a continuous and effective moisture barrier.
Using Sealing Tape for a Perfect Finish Sealing tape is essential for securing the seams and edges of the vapor barrier. Start by applying the tape along the overlapping seams, ensuring it covers the entire length of the seam. Press the tape firmly into place, smoothing out any air bubbles or wrinkles to ensure a tight bond. Use a roller or your hands to apply even pressure along the tape, enhancing its adhesion. For edges, apply the tape where the barrier meets walls, floors, or other surfaces, ensuring it sticks securely to both the barrier and the adjoining surface. This technique ensures a perfect finish, with no gaps where moisture could seep through.
Special Considerations
Sealing Around Light Fixtures and Vents Light fixtures and vents present unique challenges when installing a vapor barrier, as these areas can be points of moisture infiltration if not sealed properly. To seal around these fixtures, cut the vapor barrier to fit snugly around them, leaving minimal gaps. Use additional pieces of vapor barrier material to cover any exposed areas around the fixtures. Apply sealing tape around the edges of the cut barrier, ensuring it adheres tightly to the fixture and the surrounding barrier. For vents, ensure the tape creates an airtight seal to prevent moisture from entering through gaps. Special attention to these areas ensures the barrier remains continuous and effective.
Ensuring No Gaps or Loose Areas A continuous vapor barrier is only effective if there are no gaps or loose areas where moisture can penetrate. After installing the vapor barrier and securing all seams and edges with tape, conduct a thorough inspection. Look for any sections where the barrier may have come loose, where the tape may not be adhering properly, or where gaps might exist. Pay particular attention to corners, edges, and areas around fixtures and vents. If you find any gaps or loose areas, reinforce them with additional sealing tape or vapor barrier material as needed. This careful inspection and reinforcement process ensures that the vapor barrier provides comprehensive protection against moisture infiltration.
By mastering the art of securing seams and edges and paying special attention to challenging areas like light fixtures and vents, you can ensure a proper seal for your vapor barrier installation. These techniques help maintain the integrity of the moisture barrier, protecting the structure and enhancing the energy efficiency and longevity of your building.
Going the Extra Mile: Additional Considerations
Climate Impact
Adjustments for Different Weather Conditions When installing a vapor barrier, it's essential to adjust your approach based on the prevailing weather conditions. In colder climates, the vapor barrier is typically installed on the warm side of the insulation (inside the building) to prevent warm, moist indoor air from condensing within the walls. In warmer, more humid climates, the vapor barrier may need to be placed on the exterior side of the insulation to prevent humid outdoor air from entering the cooler interior spaces. Adjusting the placement and type of vapor barrier based on weather conditions helps maximize its effectiveness in controlling moisture.
Local Climate Considerations and How They Affect Vapor Barriers Local climate plays a significant role in determining the type and placement of vapor barriers. For example, in regions with high humidity, vapor barriers with lower permeability ratings are preferred to provide better moisture control. In areas with significant temperature fluctuations, a more durable and flexible vapor barrier material is necessary to withstand the expansion and contraction of building materials. Understanding the specific climate conditions of your area, such as average humidity levels, temperature ranges, and precipitation patterns, will guide you in selecting and installing the most appropriate vapor barrier for optimal performance and longevity.
DIY vs. Professional Installation
Pros and Cons of DIY Installation DIY installation of vapor barriers can be appealing for homeowners looking to save money and take control of their home improvement projects. The benefits of DIY installation include cost savings on labor, the flexibility to work on your own schedule, and the satisfaction of completing the project yourself. However, there are also drawbacks to consider. Installing a vapor barrier requires precise measurements, careful sealing, and attention to detail to ensure its effectiveness. Mistakes during installation can lead to gaps, improper sealing, and ultimately, moisture problems that negate the purpose of the barrier. Additionally, handling certain materials and working in challenging spaces (like attics or high ceilings) can pose safety risks.
When to Consider Hiring a Professional Hiring a professional for vapor barrier installation is often the best choice, particularly for larger or more complex projects. Professionals bring expertise and experience, ensuring that the vapor barrier is installed correctly and efficiently. They have access to specialized tools and high-quality materials, which can enhance the overall effectiveness of the moisture control system. Professionals are also familiar with local building codes and best practices, ensuring compliance and optimal performance. Consider hiring a professional if the project involves extensive areas, challenging installations (such as around numerous fixtures or vents), or if you lack the time, tools, or confidence to complete the job to a high standard.
In conclusion, taking additional considerations into account, such as climate impact and the decision between DIY and professional installation, can significantly influence the success of your vapor barrier installation. By understanding and adjusting for local weather conditions and carefully weighing the pros and cons of different installation approaches, you can ensure that your vapor barrier provides effective moisture control, enhancing the durability and energy efficiency of your building.
FAQs
Contact Crawl Logic Today!
Crawl Logic will do everything we can to ensure your experience with us is excellent.
Request A FREE Estimate
CHECKOUT RECENT POST
Schedule Your FREE Crawl Space Evaluation!
Did you know YOU DON'T HAVE TO BE HOME for us to provide you with your 100% FREE crawl space inspection and report?
CHOOSE THE BEST OPTION, CRAWL LOGIC!
Ready to Elevate Your Experience? Let's embark on a journey to success together! Our team is dedicated to delivering excellence and innovation tailored to your unique needs. Connect with us now to discover how our services can transform your vision into reality. Your next big leap starts here
Crawl Logic - Franklin Crawl Space Encapsulation and Repair
COMPANY INFO
Address: Franklin, Tennessee, United States
Email:
joshuamaynor1988@gmail.com
Phone: 615-257-9772
Office: 615-540-2278
HOURS
Monday: 8:00AM - 5:00PM
Tuesday: 8:00AM - 5:00PM
Wednesday: 8:00AM - 5:00PM
Thursday: 8:00AM - 5:00PM
Friday: 8:00AM - 5:00PM
Saturday: CLOSED
Sunday: CLOSED
Copyright © 2020 Crawl Logic - Franklin Crawl Space Encapsulation and Repair