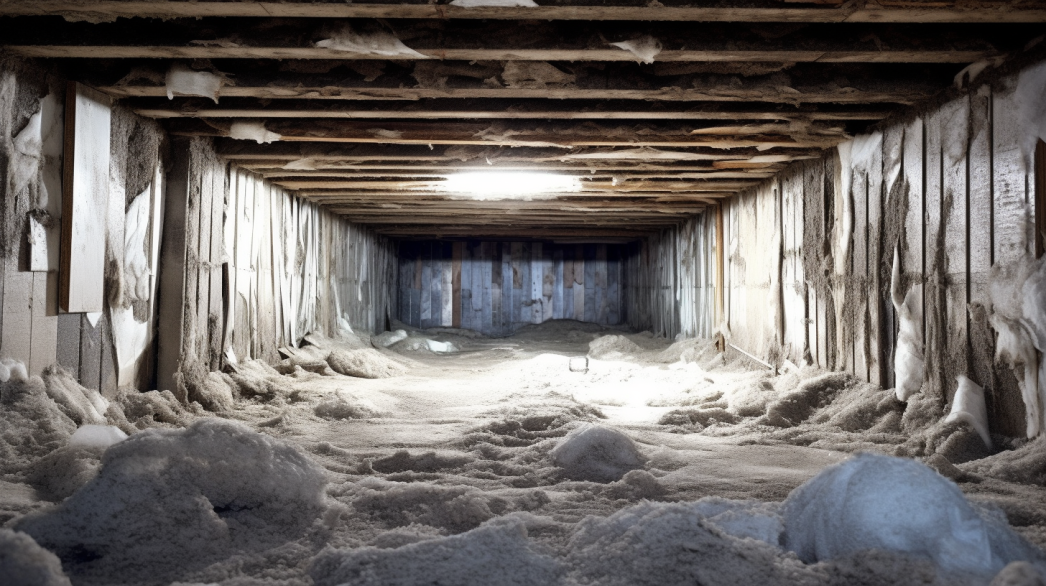
Preventing moisture infiltration around windows and doors is a critical aspect of maintaining the structural integrity, energy efficiency, and overall comfort of a building. Windows and doors are natural weak points in the building envelope, making them particularly vulnerable to water penetration. Effective moisture management in these areas helps avoid a host of problems, from structural damage to health hazards.
Protecting Structural Integrity
Moisture that infiltrates around windows and doors can seep into the surrounding walls, causing wood to rot, metal to corrode, and masonry to deteriorate. Over time, this can compromise the structural integrity of the building, leading to costly repairs and potentially dangerous situations. By ensuring that windows and doors are properly sealed and protected from moisture, homeowners can preserve the strength and stability of their home’s structure.
Enhancing Energy Efficiency
Moisture infiltration can significantly impact a building’s energy efficiency. Water damage can degrade insulation around windows and doors, reducing its effectiveness and leading to higher heating and cooling costs. Additionally, gaps and cracks that allow moisture to enter can also let conditioned air escape, further increasing energy consumption. Proper moisture control measures, such as installing effective seals and barriers, help maintain insulation performance and reduce energy bills.
Preventing Mold and Mildew Growth
Areas around windows and doors that are prone to moisture infiltration provide an ideal environment for mold and mildew to grow. These fungi not only cause unpleasant odors and unsightly stains but also pose serious health risks, including respiratory issues and allergic reactions. By preventing moisture from entering around windows and doors, homeowners can significantly reduce the risk of mold and mildew, ensuring a healthier indoor environment.
Maintaining Indoor Comfort and Air Quality
Moisture infiltration can lead to drafts and damp conditions around windows and doors, making indoor spaces less comfortable. Over time, this can affect the overall air quality inside the home, as moisture-laden air can carry pollutants and allergens. Proper sealing and moisture control around windows and doors help maintain a comfortable and healthy indoor environment by preventing drafts and keeping air quality high.
Extending the Lifespan of Windows and Doors
Excess moisture can cause windows and doors to warp, swell, and deteriorate more quickly than they otherwise would. This not only affects their functionality but also their appearance and longevity. By implementing effective moisture prevention strategies, such as using high-quality seals and ensuring proper installation, homeowners can extend the lifespan of their windows and doors, protecting their investment and maintaining the aesthetic appeal of their home.
In summary, preventing moisture infiltration around windows and doors is essential for protecting the structural integrity, energy efficiency, and indoor air quality of a home. By taking proactive measures to seal and protect these vulnerable areas, homeowners can avoid costly repairs, enhance comfort, and ensure a healthier living environment.
Understanding Vapor Barriers
What is a Vapor Barrier?
A vapor barrier is a material used in building construction designed to prevent water vapor from diffusing through walls, floors, ceilings, and other structural components. Its primary role is to manage moisture levels within the building envelope, protecting against the negative effects of condensation and moisture infiltration.
How Vapor Barriers Work to Prevent Moisture
Vapor barriers work by creating a continuous, impermeable layer that blocks the passage of water vapor. This barrier prevents moisture from moving through building materials, where it could condense into liquid water and cause damage. By controlling vapor diffusion, vapor barriers help maintain the structural integrity of buildings, prevent mold and mildew growth, and enhance indoor air quality. They are particularly important in environments with high humidity or significant temperature variations, where moisture control is crucial to maintaining a healthy and durable building.
Materials Used
Common Materials
Polyethylene: One of the most commonly used materials for vapor barriers, polyethylene sheets are durable, flexible, and provide excellent moisture resistance. They come in various thicknesses, typically ranging from 6 mils to 20 mils, to suit different applications and levels of moisture exposure.
Foil-Faced Barriers: These barriers combine a layer of foil with other materials, such as paper or plastic, to provide both moisture resistance and thermal insulation. The reflective properties of foil-faced barriers make them particularly useful in reducing radiant heat transfer in addition to blocking moisture.
Vapor Retardant Paints: Specially formulated paints that, when applied to surfaces, reduce vapor permeability and provide a protective barrier against moisture. They are often used in conjunction with other materials for added protection.
Kraft-Faced Insulation: Insulation materials with a kraft paper facing that acts as a vapor retarder. This type of insulation is commonly used in residential construction for walls and ceilings, providing both thermal insulation and moisture control.
Comparison of Different Materials
Polyethylene vs. Foil-Faced Barriers: Polyethylene sheets are highly flexible and easy to install, making them suitable for a wide range of applications. They provide strong moisture resistance but do not offer thermal benefits. Foil-faced barriers, on the other hand, not only block moisture but also provide additional thermal insulation due to their reflective properties. This makes them ideal for use in attics, basements, and other areas where both moisture and heat control are desired.
Polyethylene vs. Vapor Retardant Paints: While polyethylene sheets offer a physical barrier that is highly effective in blocking moisture, vapor retardant paints provide a more versatile solution that can be applied to existing surfaces. These paints are less intrusive and can be used in situations where adding a sheet barrier is not practical. However, their effectiveness depends on proper application and may require additional layers for optimal protection.
Polyethylene vs. Kraft-Faced Insulation: Kraft-faced insulation provides both thermal and moisture control, making it a convenient choice for new construction projects. However, it may not be as effective in high-moisture environments as polyethylene sheets, which are specifically designed for maximum moisture resistance. Kraft-faced insulation is best used in conjunction with other vapor barriers in areas with significant moisture concerns.
In conclusion, understanding the different types of vapor barriers and their specific applications helps in selecting the right material for each building project. By choosing the appropriate vapor barrier, builders can effectively manage moisture, enhance the durability of structures, and maintain a healthy indoor environment.
Benefits of Vapor Barriers for Windows and Doors
Moisture Prevention
Protection Against Water Damage Installing vapor barriers around windows and doors is essential for protecting against water damage. These areas are particularly susceptible to moisture infiltration due to their exposure to the elements and the presence of seams and joints. A vapor barrier acts as a shield, preventing water vapor from penetrating and condensing within the walls and around the frames of windows and doors. This protection is crucial for maintaining the integrity of building materials, as prolonged exposure to moisture can cause wood to rot, metal to corrode, and masonry to deteriorate. By keeping water out, vapor barriers help preserve the structural components and finishes of windows and doors.
Prevention of Mold and Mildew Mold and mildew thrive in moist environments, and their growth can be accelerated by the presence of water vapor around windows and doors. Installing vapor barriers helps to create a dry environment that is inhospitable to these fungi. This is particularly important for maintaining indoor air quality, as mold spores can cause respiratory issues, allergies, and other health problems. By preventing the buildup of moisture, vapor barriers inhibit the growth of mold and mildew, contributing to a healthier living space.
Energy Efficiency
Enhancement of Insulation Effectiveness Vapor barriers play a significant role in enhancing the effectiveness of insulation around windows and doors. Moisture can degrade insulation materials, reducing their ability to retain heat or keep cool air inside the building. By preventing moisture from infiltrating the insulation, vapor barriers help maintain its thermal performance. This ensures that the insulation works as intended, providing a more consistent indoor temperature and reducing the strain on heating and cooling systems.
Reduction in Heating and Cooling Costs Effective moisture control through the use of vapor barriers can lead to significant energy savings. When insulation is compromised by moisture, it loses its efficiency, causing heating and cooling systems to work harder to maintain a comfortable indoor environment. By keeping insulation dry and functional, vapor barriers help reduce the energy required to heat or cool the building. This translates into lower energy bills and a more environmentally friendly home or business, as less energy consumption means a smaller carbon footprint.
Structural Integrity
Protection of Window and Door Frames Window and door frames are often made of materials that are vulnerable to moisture damage, such as wood or metal. Vapor barriers provide a crucial line of defense, protecting these frames from the detrimental effects of moisture. By preventing water vapor from reaching the frames, vapor barriers help avoid problems like wood rot, warping, and rust. This protection is essential for maintaining the functionality and appearance of windows and doors, ensuring they operate smoothly and look their best.
Extension of the Lifespan of Structural Components The longevity of structural components around windows and doors is significantly enhanced by the use of vapor barriers. Moisture can cause extensive damage over time, leading to the need for costly repairs or replacements. By keeping these areas dry, vapor barriers help extend the lifespan of the building’s structural elements. This not only reduces maintenance costs but also contributes to the overall durability and value of the property. Ensuring that windows and doors remain in good condition enhances the building’s performance and aesthetics, providing long-term benefits to homeowners and property managers.
In conclusion, vapor barriers offer numerous benefits for windows and doors, including moisture prevention, improved energy efficiency, and enhanced structural integrity. By investing in proper moisture control measures, homeowners can protect their property from damage, reduce energy costs, and ensure a healthy living environment.
Preparing for Installation
Initial Assessment
Checking for Existing Moisture Issues Before installing a vapor barrier around windows and doors, it is crucial to conduct a thorough assessment for any existing moisture issues. Begin by inspecting the area for visible signs of moisture, such as water stains, mold, or mildew. Use a moisture meter to measure the moisture levels in the surrounding walls and window or door frames. Identifying and addressing these issues beforehand is essential to prevent further damage and ensure the effectiveness of the vapor barrier. Any leaks or sources of water intrusion should be repaired, and the area should be allowed to dry completely before proceeding with the installation.
Importance of a Clean and Dry Surface A clean and dry surface is fundamental for the successful installation of a vapor barrier. Dust, dirt, and debris can interfere with the adhesion of the barrier, creating gaps that allow moisture to seep through. Thoroughly clean the area around windows and doors using a vacuum or a damp cloth to remove any loose particles. Ensure that the surface is completely dry before starting the installation process, as moisture can compromise the integrity of the adhesive used to secure the vapor barrier. Taking these preparatory steps helps create a solid foundation for the vapor barrier, ensuring long-term protection against moisture infiltration.
Choosing the Right Vapor Barrier
Types Suitable for Windows and Doors Selecting the appropriate type of vapor barrier is crucial for effective moisture control around windows and doors. Several options are suitable for these areas:
- Polyethylene Sheets: These are widely used due to their durability and excellent moisture resistance. Polyethylene sheets are flexible and easy to cut to fit the precise dimensions needed.
- Foil-Faced Barriers: Combining a layer of foil with other materials, these barriers provide both moisture resistance and thermal insulation. They are particularly useful in climates where temperature control is as important as moisture control.
- Self-Adhesive Membranes: These are easy to apply and ensure a tight seal around windows and doors. Self-adhesive membranes are especially effective for creating a continuous barrier without the need for additional fastening.
Considerations for Thickness, Permeability, and Durability When choosing a vapor barrier, consider the following factors to ensure optimal performance:
- Thickness: The thickness of the vapor barrier plays a significant role in its durability and effectiveness. Thicker barriers, such as those measuring 10 to 15 mils, offer enhanced protection and are more resistant to punctures and tears. For areas with high moisture levels, thicker barriers are recommended.
- Permeability: The permeability of a vapor barrier, measured in perms, indicates how easily water vapor can pass through the material. For effective moisture control, choose barriers with low permeability ratings (less than 1 perm). This ensures that the barrier effectively blocks moisture from entering the building envelope.
- Durability: The durability of the vapor barrier is essential for long-term performance. Materials like high-density polyethylene or foil-faced barriers offer greater durability and resistance to environmental factors. Consider the specific conditions of the installation area, such as exposure to sunlight or fluctuating temperatures, and select a material that can withstand these conditions.
By carefully assessing existing moisture issues, ensuring a clean and dry surface, and selecting the appropriate vapor barrier based on thickness, permeability, and durability, you can effectively prepare for a successful installation. These steps will provide robust protection against moisture infiltration, safeguarding the structural integrity and energy efficiency of your windows and doors.
Installation Process
Step 1 - Surface Preparation
Cleaning the Area Around Windows and Doors Before starting the installation of a vapor barrier, it is crucial to thoroughly clean the area around windows and doors. Use a vacuum or a damp cloth to remove any dust, dirt, and debris from the surfaces. Pay special attention to corners, crevices, and the edges of window and door frames, as these areas are prone to accumulating grime that can interfere with the barrier's adhesion.
Ensuring Surfaces Are Dry and Free of Debris After cleaning, ensure that the surfaces are completely dry. Moisture can compromise the adhesive qualities of the vapor barrier and lead to ineffective sealing. Allow sufficient drying time after cleaning or use a fan to expedite the process. A dry, debris-free surface is essential for the vapor barrier to adhere properly and function effectively.
Step 2 - Measuring and Cutting the Vapor Barrier
Accurate Measurement Techniques Accurate measurements are key to ensuring the vapor barrier fits properly around windows and doors. Use a tape measure to carefully measure the height and width of each window and door frame. Include a few extra inches in your measurements to allow for overlapping seams and edges. Mark your measurements clearly on the vapor barrier material to guide your cuts.
Cutting the Barrier to Fit Specific Dimensions Using a sharp utility knife or scissors, cut the vapor barrier according to the marked measurements. Make sure your cuts are straight and precise to avoid gaps that could allow moisture to penetrate. If the barrier material is particularly thick, use a straight edge to guide your cuts and ensure accuracy.
Step 3 - Installing Around Windows
Attaching the Vapor Barrier to the Window Frame Begin by placing the vapor barrier against the window frame, ensuring it covers the entire area with some overlap on all sides. If using a self-adhesive barrier, peel off the backing and press the barrier firmly against the frame. For non-adhesive barriers, use a combination of adhesive tape and staples to secure the material in place.
Overlapping Edges and Securing Seams To ensure a continuous barrier, overlap the edges of the vapor barrier by at least 6 inches. Use high-quality sealing tape to secure the seams where the barrier overlaps. Press the tape firmly to ensure a tight seal, preventing any gaps where moisture could seep through.
Ensuring a Tight Seal with Adhesive or Staples For added security, use staples to attach the vapor barrier to wooden window frames, spacing them every few inches along the edges. If the window frame is metal or another material where stapling is not feasible, use a strong adhesive to create a tight seal. Ensure that the barrier is smooth and free of wrinkles for maximum effectiveness.
Step 4 - Installing Around Doors
Attaching the Vapor Barrier to the Door Frame Just like with windows, begin by fitting the vapor barrier around the door frame. Ensure that the barrier extends beyond the edges of the door frame to allow for overlapping seams. Use adhesive or staples to attach the barrier securely, depending on the frame material.
Securing the Barrier and Ensuring a Tight Fit Press the vapor barrier firmly against the door frame, ensuring it adheres well without any loose sections. Use sealing tape to secure any overlaps and ensure a continuous barrier. Pay close attention to the bottom edge of the door frame, where moisture is more likely to accumulate, and ensure it is well-sealed.
Handling Complex Areas Like Corners and Hinges Corners and hinges can be challenging areas when installing a vapor barrier. For corners, fold the barrier neatly and secure it with tape to ensure there are no gaps. For hinges, cut small slits in the barrier to accommodate them, then use additional tape to seal around the cuts. Ensure that the barrier remains continuous and intact around these complex areas to maintain effective moisture protection.
By following these detailed steps, you can ensure a successful installation of a vapor barrier around windows and doors. Proper preparation, accurate measurements, and careful installation will provide robust protection against moisture infiltration, enhancing the durability and energy efficiency of your home.
Post-Installation Tips
Inspection and Quality Check
Verifying Proper Adhesion and Coverage After installing the vapor barrier around windows and doors, a thorough inspection is essential to ensure the installation's effectiveness. Begin by examining the entire area to verify that the vapor barrier adheres properly to all surfaces. Check that the barrier is securely attached to the window and door frames, with no loose sections or areas where the adhesive has failed. Proper adhesion is crucial for maintaining a continuous barrier against moisture.
Ensure that the vapor barrier covers all intended areas completely, with sufficient overlap at seams and edges. This overlap should be at least 6 inches to provide an effective seal. Look closely at the seams to ensure that the sealing tape is firmly in place and that there are no gaps where moisture could penetrate.
Looking for Gaps or Tears Carefully inspect the vapor barrier for any gaps, tears, or punctures that could compromise its integrity. Even small gaps or tears can allow moisture to enter, defeating the purpose of the barrier. Pay special attention to areas around corners, edges, and complex shapes such as hinges and corners where the barrier may be more prone to damage.
If you find any gaps or tears, repair them immediately using sealing tape or additional vapor barrier material. Ensure that all repairs are made with the same care and attention as the initial installation to maintain a continuous, effective moisture barrier.
Routine Maintenance
Regular Checks for Wear and Tear Regular maintenance is key to ensuring the long-term effectiveness of your vapor barrier. Conduct periodic inspections, at least twice a year, to check for any signs of wear and tear. Look for areas where the barrier may have come loose, where adhesive may have degraded, or where new gaps or tears may have formed.
Check especially after extreme weather conditions, such as heavy rains or high winds, which can stress the vapor barrier and cause damage. Regular checks will help you catch and address issues early before they can lead to significant moisture problems.
Prompt Repair of Any Damage If you identify any damage during your routine inspections, it is crucial to repair it promptly. Ignoring damage, even minor, can lead to more severe issues over time as moisture infiltrates the building envelope. Use the same materials and techniques as the original installation to ensure the repairs are effective.
For small tears or gaps, sealing tape can often provide a quick and effective fix. For larger areas of damage, you may need to replace sections of the vapor barrier entirely. Ensure that all repairs maintain the integrity of the barrier and that they restore its continuous, moisture-resistant properties.
By following these post-installation tips, you can ensure that your vapor barrier continues to provide effective protection against moisture for many years. Regular inspections and prompt repairs will help maintain the structural integrity, energy efficiency, and indoor air quality of your home.
FAQs
-
What materials are used?
Common materials include polyethylene sheets, foil-faced barriers, and self-adhesive membranes.
-
Why install vapor barriers?
To prevent moisture infiltration, protecting against water damage and mold growth.
-
How to prepare surfaces?
Ensure surfaces are clean, dry, and free of debris for proper adhesion.
-
How to secure vapor barriers?
Use sealing tape or staples, ensuring a tight seal around edges and seams.
-
How to handle complex areas?
Cut carefully around corners, hinges, and use additional tape for a tight seal.
Contact Crawl Logic Today!
Crawl Logic will do everything we can to ensure your experience with us is excellent.
Request A FREE Estimate
We will get back to you as soon as possible.
Please try again later.
CHECKOUT RECENT POST


Schedule Your FREE Crawl Space Evaluation!
Did you know YOU DON'T HAVE TO BE HOME for us to provide you with your 100% FREE crawl space inspection and report?
CHOOSE THE BEST OPTION, CRAWL LOGIC!
Ready to Elevate Your Experience? Let's embark on a journey to success together! Our team is dedicated to delivering excellence and innovation tailored to your unique needs. Connect with us now to discover how our services can transform your vision into reality. Your next big leap starts here
COMPANY INFO
Address: Franklin, Tennessee, United States
Email:
joshuamaynor1988@gmail.com
Phone: 615-257-9772
Office: 615-540-2278
HOURS
Monday: 8:00AM - 5:00PM
Tuesday: 8:00AM - 5:00PM
Wednesday: 8:00AM - 5:00PM
Thursday: 8:00AM - 5:00PM
Friday: 8:00AM - 5:00PM
Saturday: CLOSED
Sunday: CLOSED
Copyright © 2020 Crawl Logic - Franklin Crawl Space Encapsulation and Repair
